Last Day for Haskell Brain!

It's the last Monday of 2021, so of course this will be my last post of the year, which you can also watch on YouTube. This year was definitely a bit different from previous years. I focused a lot more on three things. The first was video content. I started using videos for a lot more of my Monday posts. You can take a look at those on my YouTube channel. And I also started streaming most Monday evenings on Twitch, which you can find right here. I'm on my winter vacation, so I won't be on for a couple weeks though. Next stream will be January 10th!
The second big item was Haskellings. This is now a fairly stable open-source project, so it's available for anyone who wants an interactive tutorial to learn how to write Haskell starting from the ground up!
Haskell Brain
The third focus this year has been on making some new courses for Monday Morning Haskell Academy. The new, smaller courses this year include Making Sense of Monads, as well as Effectful Haskell.
And last but not least of course, there is our newest course, Haskell Brain. Today, Monday the 27th, is the last day to enroll in our Haskell Brain course. This course will teach you the basics of using Haskell and Tensor Flow together so you can write your own machine learning programs totally in Haskell. Machine learning is a super important skill in the world today, and I think it would be so cool if we could prove that it can be done and that there might even be certain advantages to doing it in Haskell. So I hope you'll take this opportunity to learn these skills.
Cheers to 2022!
I have big plans for this upcoming year. Primarily, I'm going to go back to focusing on publishing new content on a regular basis. But there will definitely be some differences in my focus areas and how I present that content. If you're interested to see where Monday Morning Haskell goes from here I encourage you to subscribe to our mailing list, so you can stay up to date with all the latest news. I hope all of you have an excellent end to your year, and I'll see you in 2022!
Learning to Navigate the Maze!

Previously on this series, we explored how we could adapt our very basic "Breadth First Search" game to be an Open AI Gym "Environment". This week, we'll take the final step and learn what it means to make our environment into a "Learning Environment". Instead of prescribing how our agent moves through the maze, we'll let it learn this for itself using reinforcement learning!
I won't go over every line of code in this particular article, but you can take a look at the full code by checking out this GitHub repository! The code we'll be looking at will be focused in the LearningEnvironment module and MazeLearner. If instead of reading about this you'd like to watch the code in action, take a look at this YouTube video!
A Learning API
Let's recall that we had this function that served as our "game loop". That is, it could take any environment and run through the game's iterations until it finished.
gameLoop ::
  (EnvironmentMonad m) => m (Action m) -> m (Observation m, Reward)
gameLoop chooseAction = do
  newAction <- chooseAction
  (newObs, reward, done) <- stepEnv newAction
  if done
    then return (newObs, reward)
    else gameLoop chooseAction
We also had a comparable function for a "Renderable" environment that would render the game state with each iteration.
What would it look like, at a high level, for us to make a "learning" loop? That is, what API functions would we want to be available to cause our game agent to learn and improve from iteration to iteration?
I propose we would want at least three elements. First, the "choose action" function should now be an explicit part of the state, rather than a function parameter. Second, we naturally need a "learn" function that takes the observations and rewards and adjusts whatever state we use for choosing the action.
Finally, we should be able to reduce our "exploration rate". For many learning algorithms, we'll want to allow it a chance to "explore" options at first rather than use its own brain. This prevents it from getting stuck in bad habits early on. But we want to reduce the probability of randomness over time so that it can assert the information it has learned.
We'll also want to add an extra layer to our loop. We want to run many iterations of the game over time, rather than a single iteration. After a certain number of iterations, we'll reduce the exploration rate.
Here's a first pass at what these functions might look like. Notice how they rely on our previous environment functions like current observation, stepEnv and resetEnv.
gameLearningLoop = do
  oldObs <- currentObservation
  newAction <- chooseActionBrain
  (newObs, reward, done) <- stepEnv newAction
  learnEnv oldObs newAction newObs reward
  if done
    then return reward
    else gameLearningLoop

gameLearningIterations = forM [1..numEpisodes] $ \i -> do
  resetEnv
  when (i `mod` 100 == 99) $ do
    reduceExploration decayRate minEpsilon
  reward <- gameLearningLoop
  return reward
  where
    numEpisodes = 1000
    decayRate = 0.9
    minEpsilon = 0.01
Those parameters at the bottom could be inputs to our function or constants. But we see that this function will accumulate the total reward values for each run of our game.
Making a Class
This idealized function informs some of the pieces we'll need for a "Learning Environment" class. What's clear though is that this class should "wrap" the monad for our environment. In this way, we don't need to modify our exist game's monad just to make it learn a particular way. So the first thing we'll do with this class is use an associated type to assign our environment monad. We'll also want a lift function that will take actions in the environment/game and bring them into the learning monad.
class (Monad m) => LearningEnvironment m where
  type Env m :: * -> *
  liftEnv :: (Env m) a -> m a
  ...
Notice how the "kind" is * -> * because our environment is a monad!
Naturally, we'll also want a "learning state" that is separate from the environment's state. This will store our exploration rate, amoung other things. We'll include functions from getting and setting this state. This is also a good opportunity to include our exploration functions. We should be able to "get" it and then reduce it.
class (Monad m) => LearningEnvironment m where
  type Env m :: * -> *
  liftEnv :: (Env m) a -> m a
  type LearningState m :: *
  getLearningState :: m (LearningState m)
  putLearningState :: (LearningState m) -> m ()
  explorationRate :: m Double
  reduceExploration :: Double -> Double -> m ()
  ...
Finally, we reach our two critical functions, choosing an action and learning. Choosing an action will involve selecting an action corresponding to our environment. This is simple in concept, but the type signature gets a little odd:
class (Monad m) => LearningEnvironment m where
  ...
  chooseActionBrain ::
    (EnvironmentMonad (Env m)) => m (Action (Env m))
We have Env m which is our environment type, and then the Action is associated with that environment, hence Action (Env m). Plus, our environment is constrained by an EnvironmentMonad.
Now finally, the learn function. This takes four parameters
The "starting" observation The action we took based on that observation The "new" observation resulting from that action The reward from taking that action.
Then it will update the learning state, though it will not provide a return value.
class (Monad m) => LearningEnvironment m where
  ...
  learnEnv ::
    (EnvironmentMonad (Env m)) =>
    (Observation (Env m)) ->
    (Action (Env m)) ->
    (Observation (Env m)) ->
    Reward ->
    m ()
These definitions complete our class!
A Basic Implementation
As with the maze game itself, this code only runs if we create an instance for it! So let's start by defining our learning state type. What information do we need to store that will help us select our move and learning appropriately?
For this example, we're going to use a basic form of Q-Learning. In Q-Learning, we have a function that takes an observation and action and produces a score value. So in any given situation, our "move" is to select the action with the highest score. The rewards then let us calibrate how this function operates, gradually assigning higher scores to actions with higher rewards.
In the most basic form of Q-Learning, our function is a table where every combination of observation and action corresponds to a score. This approach doesn't scale to harder games with more options, but it helps illustrate the approach. So our learning state needs an array to represent this "Q-table".
It will also need to store the current exploration rate and a random generator, which will tell us when to make random moves (and which random move to select).
data MazeLearnerState = MazeLearnerState
  { qTable :: A.Array (Word, Word) Double
  , explorationR :: Double
  , randomGenerator :: StdGen
  }
Now our monadic type will be a state over both this "Learner State" and the "Maze Game State".
newtype MazeLearnerM a = MazeLearnerM
  (StateT (MazeLearnerState, MazeGameState) IO a)
  deriving (Functor, Applicative, Monad)

instance (MonadState (MazeLearnerState, MazeGameState)) MazeLearnerM
  ...
Why does it need both? This becomes clear when we start making the instance. To implement liftEnv, we'll "get" the state, and then pass it by "running" the environment.
instance LearningEnvironment MazeLearnerM where
  type (Env MazeLearnerM) = MazeGameM
  liftEnv (MazeGameM action) = do
    (ln, gs) <- get
    (result, gs') <- liftIO $ runStateT action gs
    put (ln, gs')
    return result
Of course, we'll also assign our learner state and the getter/setter combination.
instance LearningEnvironment MazeLearnerM where
  type (LearningState MazeLearnerM) = MazeLearnerState
  getLearningState = fst <$> get
  putLearningState ln' = do
    (_, gs) <- get
    put (ln', gs)
  ...
The rest of this definition is pretty simple boilerplate, except for choosing the action and learning. So let's see how to implement the Q-Learning approach with these.
Q-Learning
To start, let's assume we have some helper functions. I'll list the type signatures without getting bogged down in the definitions. We need to convert back and forth between an Observation (which is a Location) and its index within our Q-table (a Word).
locationToIndex :: Location -> Grid -> Word

indexToLocation :: Word -> Grid -> Location
We also need a maxScore function. This will take a location/observation index (so a Word) as well as the Q-table, and produce the maximum score we get from that observation, considering all the possible moves.
maxScore ::
  Word -> A.Array (Word, Word) Double -> (Double, (Word, Word))
Now when it comes to selecting an action, we have two main branches. We have to start by "rolling the dice" and determining if this will be a random/exploratory move, or a "brain" move with our Q-table.
chooseActionQTable :: MazeLearnerM Direction
chooseActionQTable = do
  lnSt <- getLearningState
  let (exploreRoll, gen') = randomR (0.0, 1.0) (randomGenerator lnSt)
  if exploreRoll < explorationR lnSt
    then ... -- Explore randomly
    else ... -- Use our Q-table
The random move is a matter of taking a second roll over our 5 action possibilities, updating the learning state with the new generator, and then returning the enum corresponding to the selected number.
chooseActionQTable :: MazeLearnerM Direction
chooseActionQTable = do
  lnSt <- getLearningState
  let (exploreRoll, gen') = randomR (0.0, 1.0) (randomGenerator lnSt)
  if exploreRoll < explorationR lnSt
    then do
      let (actionRoll, gen'') = randomR (0, 4) gen'
      putLearningState $ lnSt { randomGenerator = gen'' }
      return (toEnum actionRoll)
    else ...
Now to use our Q-table, we retrieve our environment, convert our location into an index, get the max score for that index, and again convert that to an enum (replacing the random generator again).
chooseActionQTable :: MazeLearnerM Direction
chooseActionQTable = do
  lnSt <- getLearningState
  let (exploreRoll, gen') = randomR (0.0, 1.0) (randomGenerator lnSt)
  if exploreRoll < explorationR lnSt
    then ...
    else do
      env <- liftEnv get
      let obsIndex = locationToIndex (playerLoc env) (gameGrid env)
      let maxIndex = snd $ snd $ maxScore obsIndex (qTable lnSt)
      putLearningState $ lnSt { randomGenerator = gen' }
      return (toEnum (fromIntegral maxIndex))
To improve this, we could use the set of possible action from our underlying state, rather than hardcoding [0..4].
The Learn Function
Most of the logic for our learning function is straightforward. We retrieve our learning state and the game grid. We determine indices for the input observations and action so we can index into our Q-table.
learnQTable ::
  Location -> Direction -> Location -> Reward -> MazeLearnerM ()
learnQTable loc1 direction loc2 (Reward reward) = do
  lnSt <- getLearningState
  let q = qTable lnSt
  grid <- gameGrid <$> liftEnv get
  let actionIndex = fromIntegral . fromEnum $ direction
      observationIndex1 = locationToIndex loc1 grid
      observationIndex2 = locationToIndex loc2 grid
      ...
For our next steps. First, we get the prediction score value from the Q-table. Then we determine the "target" score value. This is based on the actual reward we got and the best score we can get from our new location. This second piece allows us to "propagate" rewards from the end to more intermediate stages.
We determine a new value to place in the Q-table which comes from this difference, modified by the learning rate. And finally, we place this new value in our Q-table and update the learning state.
learnQTable ::
  Location -> Direction -> Location -> Reward -> MazeLearnerM ()
learnQTable loc1 direction loc2 (Reward reward) = do
  lnSt <- getLearningState
  let q = qTable lnSt
  grid <- gameGrid <$> liftEnv get
  let actionIndex = fromIntegral . fromEnum $ direction
      observationIndex1 = locationToIndex loc1 grid
      observationIndex2 = locationToIndex loc2 grid
      prediction = q A.! (observationIndex1, actionIndex)
      target = reward + gamma * (fst $ maxScore observationIndex2 q)
      newValue = prediction + learningRate * (target - prediction)
      newQ = q A.// [((observationIndex1, actionIndex), newValue)]
  putLearningState $ lnSt { qTable = newQ }
  where
    gamma = 0.96
    learningRate = 0.81
Ads an improvement, we could also make "gamma" and the learning rate part of our state and change them over time.
Evaluating Our Game
So what does it look like to run this? Well our game loop functions from up above will work, but it will help us to also keep track of how many iterations are needed to win AND what the cumulative reward is (rather than just the final reward).
We can now also include the (rather complicated) type signatures and other modifications we need to work with our class.
gameLearningLoop ::
  (LearningEnvironment m, EnvironmentMonad (Env m)) =>
  (Int, Reward) -> m (Int, Reward)
gameLearningLoop (i, oldReward) = do
  oldObs <- liftEnv currentObservation
  newAction <- chooseActionBrain
  (newObs, reward, done) <- liftEnv $ stepEnv newAction
  learnEnv oldObs newObs reward newAction
  let newReward = oldReward + reward
  if done
    then return (i, newReward)
    else gameLearningLoop (i + 1, newReward)

gameLearningIterations ::
  (LearningEnvironment m, EnvironmentMonad (Env m)) =>
  m [(Int, Reward)]
gameLearningIterations = forM [1..numEpisodes] $ \i -> do
  liftEnv resetEnv
  when (i `mod` 100 == 99) $ do
    reduceExploration decayRate minEpsilon
  (count, reward) <- gameLearningLoop (0, Reward 0.0)
  return (count, reward)
  where
    numEpisodes = 1000
    decayRate = 0.9
    minEpsilon = 0.01
And last but not least, a bit of code to run this loop with a starting environment. We'll return the rewards and results from the first 10 runs, as well as the last 10 runs.
runLearningWithBase :: IO ([(Int, Reward)], [(Int, Reward)])
runLearningWithBase = do
  gen <- getStdGen
  let lnSt = MazeLearnerState
               (A.listArray ((0, 0), (15, 4)) (repeat 0.0))
               0.9
               gen
  results <- evalStateT
    (runMazeLearner gameLearningIterations)
     (lnSt, baseEnvironment)
  return $ (take 10 results, (drop (length results - 10)) results)

runMazeLearner ::
  MazeLearnerM a -> StateT (MazeLearnerState, MazeGameState) IO a
runMazeLearner (MazeLearnerM action) = action
Results!
With a few tweaks to our reward system, we can get some good results. First, we'll have a score of 50.0 for reaching the goal. Then a score of -1.0 for making an illegal move, as well as a score of -0.1 for making normal moves, to encourage faster progress.
In our first set of runs, we get values that take a lot longer, often requiring 30-50 moves to reach the goal. One example takes 175 moves!
[
  (46,Reward 30.1),
  (26,Reward 40.2),
  (39,Reward 37.1),
  (45,Reward 31.1),
  (51,Reward 29.6),
  (45,Reward 30.2),
  (175,Reward (-17.0)),
  (59,Reward 26.1),
  (56,Reward 26.4),
  (30,Reward 34.4)
]
Then in the latter set, we can see that single digit results are common (5 is optimal). Scores are much closer to 50, with fewer illegal moves made. Though some will still exist, since the exploration rate in always non-zero.
[
  (6,Reward 48.5),
  (11,Reward 48.0),
  (7,Reward 47.5),
  (5,Reward 49.5),
  (6,Reward 49.4),
  (8,Reward 49.2),
  (13,Reward 46.0),
  (13,Reward 46.0),
  (7,Reward 48.4),
  (10,Reward 48.1)
]
Haskell Brain
A lot of more precise learning algorithms for harder problems will require you to use more advanced tools like TensorFlow. Lucky for you, our Haskell Brain course is now open for enrollment! This course will teach you how to use the Haskell TensorFlow bindings to write simple machine learning programs in Haskell! So if you've always wanted to do this kind of AI-related work in Haskell, but didn't think the language had the tools, now is your chance to learn how to use one of the most important libraries in this field. So sign up today!
Implementation: Creating a Maze Environment

In our last episode we explored the similarities and differences of the "World" idea from Gloss and the "Environment" of Open AI Gym. We designed a Haskell typeclass to capture this idea of an environment that could use associated data types connected for the specific game we're playing.
Now this week we're going to show this class in action. We're going to take our toy example of using BFS to search through a maze and we're going to make an Environment for it! We'll see how all these details fit together and we'll see the game play out in our console!
The code in this article is available on GitHub! For this article, you should focus on the MazeEnvironment module. If you'd like to watch this article as a video instead, take a look at this YouTube video!
There's also a special announcement at the end of this post if you're interested in AI and machine learning, so make sure you read to the end! Let's get started!
Defining Our Types
I may sound like a broken record at this point, but we're going to start by defining some types! First we'll make the State type for our environment, which will be functionally equivalent to our previous World type in Gloss.
data MazeGameState = MazeGameState
  { playerLoc :: Location
  , startLoc :: Location
  , endLoc :: Location
  , gameGrid :: Grid
  }
This state isn't the object of our class though! In order to do that, we have to build a monadic type. So what monad should we use? Naturally, we want to use the State monad to track our "State" type. Seems pretty obvious. We'll also include IO so that we can render our game later.
newtype MazeGameM a = MazeGameM (StateT MazeGameState IO a)
  deriving (Functor, Applicative, Monad)
Let's also define some basic monad instances like MonadState and MonadIO. This will make our life easier when we write our implementation code!
instance (MonadState MazeGameState) MazeGameM where
  get = MazeGameM get
  put env = MazeGameM $ put env

instance MonadIO MazeGameM where
  liftIO action = MazeGameM (lift action)
Instance Types
Now that we've got our monadic type we're ready to start making our instance. First, we want to assign the associated types. Remember these are the Observation type, the Action type, and the "Environment State" type.
When it comes to the observation, the "mutable" data we have in our game state is just the player's location. So we can assign Location as the corresponding type in our class.
For the "action", we have 5 options. We can move in any of the four cardinal directions, or we can make no move. So let's define an enum for that.
data Direction =
  MoveUp |
  MoveLeft |
  MoveDown |
  MoveRight |
  MoveNone
  deriving (Show)
And of course we'll use our state from above for the environment type. So here's what our instance looks like so far:
instance EnvironmentMonad MazeGameM where
  type (Observation MazeGameM) = Location
  type (Action MazeGameM) = Direction
  type (EnvironmentState MazeGameM) = MazeGameState
  ...
Simple Functions
Now we can start filling in the functions and expressions for the instance. To "reset" our environment, we just want to change the player's location to the start:
resetGame :: MazeGameM Location
resetGame = do
  current <- get
  put $ current { playerLoc = startLoc current }
  return (startLoc current)
Running the environment is also rather simple. Give an action in our monad, we'll unwrap its state action, run that with the given environment, and produce the IO action!
instance EnvironmentMonad MazeGameM where
  ...
  resetEnv = resetGame
  runEnv env (MazeGameM action) = evalStateT action env
  ...
After that, getting the "current" observation is as easy as querying for the player's location. And for "possible actions" we'll just return a full list of the enum values. If we wanted to get fancy, we could remove the option of moving into walls or off the board, but we'll need to handle that logic later anyways, so we'll keep this part simple.
instance EnvironmentMonad MazeGameM where
  type (Observation MazeGameM) = Location
  type (Action MazeGameM) = Direction
  type (EnvironmentState MazeGameM) = MazeGameState
  resetEnv = resetGame
  runEnv env (MazeGameM action) = evalStateT action env
  currentObservation = MazeGameM (playerLoc <$> get)
  possibleActions _ = return [MoveUp, MoveLeft, MoveDown, MoveRight, MoveNone]
  ...
Stepping Forward
We just have one field left, but it's the most complicated! We need to determine how to "step" the game based on an action. This will always be the toughest part because this is where all your game logic really happens! Our game is pretty simple though. Let's actually start with a few helpers.
First, let's determine if a space is a valid move in our grid. We just check that it's in bounds and that it is not a wall:
isValidLoc :: Location -> Grid -> Bool
isValidLoc (r, c) grid =
  r >= 0 &&
  c >= 0 &&
  r <= (fst . snd) (A.bounds grid) &&
  c <= (snd . snd) (A.bounds grid) &&
  grid A.! (r, c) == Empty
Now we want two functions that are kind of inverses. We'll use findNextLoc to take a current location and the direction, and give us the next location. Then moveDirection will do the opposite, taking a start and end point and giving us the direction between them.
findNextLoc :: Direction -> Location -> Location
findNextLoc MoveUp (r, c) = (r - 1, c)
findNextLoc MoveLeft (r, c) = (r, c - 1)
findNextLoc MoveDown (r, c) = (r + 1, c)
findNextLoc MoveRight (r, c) = (r, c + 1)
findNextLoc MoveNone (r, c) = (r, c)

moveDirection :: Location -> Location -> Direction
moveDirection (r, c) nextLoc
  | nextLoc == (r - 1, c) = MoveUp
  | nextLoc == (r, c - 1) = MoveLeft
  | nextLoc == (r + 1, c) = MoveDown
  | nextLoc == (r, c + 1) = MoveRight
  | otherwise = MoveNone
Now we're ready to write our step function. Recall that this function will take our game's action, which is a direction that we desire to move. We start by retrieving the game state and the current location.
stepGame :: Direction -> MazeGameM (Location, Reward, Bool)
stepGame direction = do
  current <- get
  let currentLoc = playerLoc current
  ...
Now we can find the next location based on this direction. If it's valid, we'll assign it as our "final" location (if not, we use the previous location). Then we save this in our state with "put".
stepGame :: Direction -> MazeGameM (Location, Reward, Bool)
stepGame direction = do
  current <- get
  let currentLoc = playerLoc current
  let nextLoc = findNextLoc direction currentLoc
  let finalLoc = if isValidLoc nextLoc (gameGrid current)
                   then nextLoc
                   else currentLoc
  put $ current { playerLoc = finalLoc }
  ...
Finally, we must determine our return values! Of course, the final location provides our new observation. If our new location is the final location, we'll provide the user with a "reward" of 1.0 and declare the game to be "done". Otherwise, we give no reward and the game goes on.
stepGame :: Direction -> MazeGameM (Location, Reward, Bool)
stepGame direction = do
  current <- get
  let currentLoc = playerLoc current
  let nextLoc = findNextLoc direction currentLoc
  let finalLoc = if isValidLoc nextLoc (gameGrid current)
                   then nextLoc
                   else currentLoc
  put $ current { playerLoc = finalLoc }
  let done = finalLoc == endLoc current
  let reward = if currentLoc /= finalLoc && done
                  then Reward 1.0
                  else Reward 0.0
  return (finalLoc, reward, done)
Filling this function in for stepEnv then completes our instance definition!
```haskell
instance EnvironmentMonad MazeGameM where
  ...
  stepEnv = stepGame
Playing Our Game
Now to play the game, we need to supply a "brain". That is, we need to be able to choose an action based on the game state. First, we retrieve the environment:
chooseMoveMaze :: MazeGameM Direction
chooseMoveMaze = do
  env <- get
  ...
With access to the game's grid and the relevant locations, we can then turn to our trusty Breadth-First-Search function!
chooseMoveMaze :: MazeGameM Direction
chooseMoveMaze = do
  env <- get
  let path = bfsSearch (gameGrid env) (playerLoc env) (endLoc env)
  ...
If there is no path, our direction is "None". Otherwise, we can take the first item from the path, and use moveDirection to calculate the direction we need. And then we're done!
chooseMoveMaze :: MazeGameM Direction
chooseMoveMaze = do
  env <- get
  let path = bfsSearch (gameGrid env) (playerLoc env) (endLoc env)
  case path of
    [] -> return MoveNone
    (move : _) -> return $ moveDirection (playerLoc env) move
Now we can play our game! We'll create a basic environment, and use gameLoop from last week, in conjunction with our brain function!
>> let baseEnv = MazeGameState (0,0) (0, 0) (2, 2) baseGrid
>> runEnv baseEnv (gameLoop chooseMoveMaze)
Rendering Our Game
This is great! We can now play our game...in theory. But in practice, we'd like to be able to see what's going on! So let's make a render function and make our environment renderable! Let's start by defining an ASCII character to correspond with each kind of location in the game.
- Use 'o' for the player's location
- Use 'x' for walls
- Use 'F' for the "finish"
- Use underscore '_' for blank spaces
This is a simple function to write:
charForLoc :: MazeGameState -> Location -> Char
charForLoc env loc = if loc == playerLoc env
  then 'o'
  else if loc == endLoc env
    then 'F'
    else if gameGrid env A.! loc == Wall then 'x' else '_'
Now to render, we just have to divide our Array into its constituent rows. The groupBy function is the easiest way to do this. We use the first element of the tuple index to do the matching.
instance RenderableEnvironment MazeGameM where
  renderEnv = do
    env <- get
    let rows = groupBy
                 (\((a, _), _) ((b, _), _) -> a == b)
                 (A.assocs (gameGrid env))
    ...
Now we just do a nested loop, and print the character for each cell!
instance RenderableEnvironment MazeGameM where
  renderEnv = do
    env <- get
    let rows = groupBy
                 (\((a, _), _) ((b, _), _) -> a == b)
                 (A.assocs (gameGrid env))
    forM_ rows $ \row -> liftIO $ do
      forM_ row $ \(l, _) -> putChar (charForLoc env l)
      putStr "\n"
    liftIO $ putStr "\n"
Now instead of using gameLoop like above, we can use gameRenderLoop!
>> let baseEnv = MazeGameState (0,0) (0, 0) (2, 2) baseGrid
>> runEnv baseEnv (gameRenderLoop chooseMoveMaze)
...
It will display the game at each stage so we can see our player moving along!
o___
_xx_
_xF_
____

_o__
_xx_
_xF_
____

__o_
_xx_
_xF_
____

___o
_xx_
_xF_
____

____
_xxo
_xF_
____

____
_xx_
_xFo
____

____
_xx_
_xo_
____
Special Announcement!
Now the only thing cooler than making a game with a working AI is having that AI learn for itself what to do! Next time, we'll modify our environment so it can use machine learning to improve an agent's behavior over time! We'll use a simple reinforcement learning approach to help our player navigate this simple maze.
If you've made it this far, you deserve to hear our special announcement, which is very much related to this idea of machine learning. One of the most important technologies when it comes to machine learning these days is TensorFlow. But as with Open Gym AI, most of the support for TensorFlow is in Python, not Haskell.
But a Haskell library does exist for TensorFlow! And today I am releasing a new course called Haskell Brain that will help you learn how to use this library. It goes over the basics of getting setup with Haskell and TensorFlow on your machine, as well as all the conceptual and syntactic ideas you need to get started writing your code. So if combining machine learning and Haskell sounds like a thrilling idea to you, then head to our course page now!
From World to Environment: Open AI Gym Primer

In last week's article, we briefly entered the world of Haskell's Gloss library and illustrated our search algorithm in action. An integral part of this process was creating and using a particular World type to store information about the state of our game and process updates.
This week we'll discuss the Open AI Gym. This framework is widely used to help people learn about AI algorithms and how to train them using machine learning techniques. It has its own concept of an "environment" that is very similar to this "World" idea. It's worth comparing these concepts, and it's especially fun to consider how to re-create the "environment" in Haskell. This is a (somewhat) novel area where type families can help us out. So read on to learn how!
You can see all the code for this series on GitHub! For this article, you should look at the Environment module. This article is also available as a video on YouTube!
Review of World Type
Let's recall our World type from last time:
data World = World
  { playerLocation :: Location
  , startLocation :: Location
  , endLocation :: Location
  , worldGrid :: Grid
  }
This type stores all the information, both mutable and immutable, about our game. It tells us the grid that we are navigating, as well as the current location of the "player", which can change.
Our game then is largely defined by functions that operate on this world:
play :: Display -> Color -> Int
  -> world
  -> (world -> Picture)
  -> (Event -> world -> world)
  -> (Float -> world -> world)
  -> IO ()

drawingFunc :: World -> Picture

inputHandler :: Event -> World -> World

updateFunc :: Float -> World -> World
We require a function to draw our world, a function to change the world based on user actions, and a function to let the world evolve naturally. And, of course, we need to create our initial world in order to start the game off.
Open Gym Environment
Now let's compare that to some code from Open AI Gym. Here's a Python snippet you can find on the Open AI Gym website:
import gym
env = gym.make("CartPole-v1")
observation = env.reset()
for _ in range(1000):
  env.render()
  action = env.action_space.sample() # Takes a random action
  observation, reward, done, info = env.step(action)

  if done:
    observation = env.reset()
env.close()
Let's note how this environment is used:
We create it ("make") and can "reset" it. Resetting it produces an "observation". The environment has an "action space", a set of available actions. We can "step" the environment forward using one of these actions, producing a new observation, a reward, and a boolean indicating if we're "done". We can "render" the environment.
Like our World, an environment clearly stores all the information about a game. But we also have this subset of information that we refer to as the "observation". This, generally speaking, is information a player of the game actually has access to, and it ought to be mutable.
Next, we "step" the game forward using one of the possible actions at a point. This is a combination of the input handler and update function from our Gloss example. When we step forward, we usually impact the world with our action, but the world also goes through its own natural evolution. This produces a new observation from which we'll base our next action.
We also see a "reward" as a result of each action. This is something unique to the environment. Rewards are very important in training any kind of algorithm using machine learning. It's how we tell our program what a "good" move is.
And of course, it's useful to be able to render or draw our environment, though this isn't strictly necessary for the game's logic.
Making a Haskell Environment
There's a distinct drawback of using Python though. The types of several of our environment-related expressions above are unclear! What information, exactly, is stored in the environment? What does an "action" look like, or an "observation"? In very basic games, both the action and observation can be simple integers, but it's tricky to make heads or tails of that.
So let's consider what an "Environment" with this kind of API would look like in Haskell. We're tempted of course, to make this a specific type. But we don't have type-level inheritance in Haskell. And we'll want to create some kind of pattern that different games can inherit from. So it's actually better to make this a typeclass. And, since our game will need to have different side effects, we'll make it a monadic typeclass:
class (Monad m) => EnvironmentMonad m where
  ...
And this is where the fun begins! Each different game environment will have its types associated with it, corresponding to the environment state, an action, and an observation. So we can use type family syntax to associate these types with the class variable m:
class (Monad m) => EnvironmentMonad m where
  type Observation m :: *
  type Action m :: *
  type EnvironmentState m :: *
  ...
We can use these types within our other class functions as well. For example, we should be able to produce the current observation. And given an observation, we should be able to describe the available actions. We should also be able to reset the environment.
class (Monad m) => EnvironmentMonad m where
  type Observation m :: *
  type Action m :: *
  type EnvironmentState m :: *
  currentObservation :: m (Observation m)
  possibleActions :: Observation m -> m [Action m]
  resetEnv :: m (Observation m)
  ...
Finally, we need two more items. First, our "step" function. This takes an action as input, and it produces a new observation, a reward, and a boolean, indicating that we are done. Then the last item will be more Haskell specific. This will be a "run" function. It will allow us to take an action in our monad, combined with the environment state, and turn it into a normal IO action we can run elsewhere.
newtype Reward = Reward Double

class (Monad m) => EnvironmentMonad m where
  type Observation m :: *
  type Action m :: *
  type EnvironmentState m :: *
  currentObservation :: m (Observation m)
  possibleActions :: Observation m -> m [Action m]
  resetEnv :: m (Observation m)
  stepEnv :: (Action m) -> m (Observation m, Reward, Bool)
  runEnv :: (EnvironmentState m) -> m a -> IO a
If we are interested in rendering our environment, we can make a new typeclass that inherits from our base class. It should also inherit from IO, because any kind of rendering will involve IO.
class (MonadIO m, EnvironmentMonad m) => RenderableEnvironment m where
  renderEnv :: m ()
Using this class, we can write some generic code that will work on any game! Here's a couple loop functions. This first will work on any environment, though it requires we supply our own function to choose an action. This is really the "brain" of the game, which we'll get into more next time!
gameLoop ::
  (EnvironmentMonad m) => m (Action m) -> m (Observation m, Reward)
gameLoop chooseAction = do
  newAction <- chooseAction
  (newObs, reward, done) <- stepEnv newAction
  if done
    then return (newObs, reward)
    else gameLoop chooseAction
And if we want to render our game each time, we can just add this separate constraint, and add the extra render steps in between!
gameRenderLoop :: (RenderableEnvironment m) => m (Action m) -> m (Observation m, Reward)
gameRenderLoop chooseAction = do
  renderEnv
  newAction <- chooseAction
  (newObs, reward, done) <- stepEnv newAction
  if done
    then renderEnv >> return (newObs, reward)
    else gameRenderLoop chooseAction
Conclusion
So there are a lot of similarities between these two systems, but clearly Open AI Gym is a little more involved and detailed. But Haskell provides some interesting mechanisms for us to add more type-clarity around our environments.
Next week, we'll actually use this environment class and apply it to our simple Breadth-First-Search example. This will really get us started on the road to applying machine learning to this problem, so you won't want to miss out! Make sure to subscribe to Monday Morning Haskell so you can stay up to date with what's going on here!
See and Believe: Visualizing with Gloss

Last week I discussed AI for the first time in a while. We learned about the Breadth-First-Search algorithm (BFS) which is so useful in a lot of simple AI applications. But of course writing abstract algorithms isn't as interesting as seeing them in action. So this week I'll re-introduce Gloss, a really neat framework I've used to make some simple games in Haskell.
This framework simplifies a lot of the graphical work one needs to do to make stuff show up on screen and it allows us to provide Haskell code to back it up and make all the logic interesting. I think Gloss also gives a nice demonstration of how we really want to structure a game and, in some sense, any kind of interactive program. We'll break down how this structure works as we make a simple display showing the BFS algorithm in practice. We'll actually have a "player" piece navigating a simple maze by itself.
To see the complete code, take a look at this GitHub repository! The Gloss code is all in the Game module.
Describing the World
In Haskell, the first order of business is usually to define our most meaningful types. Last week we did that by specifying a few simple aliases and types to use for our search function:
type Location = (Int, Int)
data Cell = Empty | Wall
  deriving (Eq)
type Grid = A.Array Location Cell
When we're making a game though, there's one type that is way more important than the rest, and this is our "World". The World describes the full state of the game at any point, including both mutable and immutable information.
In describing our simple game world, we might view three immutable elements, the fundamental constraints of the game. These are the "start" position, the "end" position, and the grid itself. However, we'll also want to describe the "current" position of our player, which can change each time it moves. This gives us a fourth field.
data World = World
  { playerLocation :: Location
  , startLocation :: Location
  , endLocation :: Location
  , worldGrid :: Grid
  }
We can then supplement this by making our "initial" elements. We'll have a base grid that just puts up a simple wall around our destination, and then make our starting World.
-- looks like:
-- S o o o
-- o x x o
-- o x F o
-- o o o o
baseGrid :: Grid
baseGrid =
  (A.listArray ((0, 0), (3, 3)) (replicate 16 Empty))
  A.//
  [((1, 1), Wall), ((1, 2), Wall), ((2, 1), Wall)]

initialWorld :: World
initialWorld = World (0, 0) (0, 0) (2, 2) baseGrid
Playing the Game
We've got our main type in place, but we still need to pull it together in a few different ways. The primary driver function of the Gloss library is play. We can see its signature here.
play :: Display -> Color -> Int
  -> world
  -> (world -> Picture)
  -> (Event -> world -> world)
  -> (Float -> world -> world)
  -> IO ()
The main pieces of this are driven by our World type. But it's worth briefly addressing the first three. The Display describes the viewport that will show up on our screen. We can give it particular dimensions and offset:
windowDisplay :: Display
windowDisplay = InWindow "Window" (200, 200) (10, 10)
The next two values just indicate the background color of the screen, and the tick rate (how many game ticks occur per second). And after those, we just have our initial world value as we made above.
main :: IO ()
main = play
  windowDisplay white 1 initialWorld
  ...
But now we have three more functions that are clearly driven by our World type. The first is a drawing function. It takes the current state of the world and create a Picture to show on screen.
The second function is an input handler, which takes a user input event as well as the current world state, and returns an updated world state, based on the event. We won't address this in this article.
The third function is an update function. This describes how the world naturally evolves without any input from tick to tick.
For now, we'll make type signatures as we prepare to implement these functions for ourselves. This allows us to complete our main function:
main :: IO ()
main = play
  windowDisplay white 20 initialWorld
  drawingFunc
  inputHandler
  updateFunc

drawingFunc :: World -> Picture

inputHandler :: Event -> World -> World

updateFunc :: Float -> World -> World
Let's move on to these different world-related functions.
Updating the World
Now let's handle updates to the world. To start, we'll make a stubbed out input-handler. This will just return the input world each tick.
inputHandler :: Event -> World -> World
inputHandler _ w = w
Now let's describe how the world will naturally evolve/update with each game tick. For this step, we'll apply our BFS algorithm. So all we really need to do is retrieve the locations and grid out of the world and run the function. If it gives us a non-empty list, we'll substitute the first square in that path for our new location. Otherwise, nothing happens!
updateFunc :: Float -> World -> World
updateFunc _ w@(World playerLoc _ endLoc grid time) =
  case path of
    (first : rest) -> w {playerLocation = first}
    _ -> w
  where
    path = bfsSearch grid playerLoc endLoc
Note that this function receives an extra "float" argument. We don't need to use this.
Drawing
Finally, we need to draw our world so we can see what is going on! To start, we need to remember the difference between the "pixel" positions on the screen, and the discrete positions in our maze. The former are floating point values up to (200.0, 200.0), while the latter are integer numbers up to (3, 3). We'll make a type to store the center and corner points of a given cell, as well as a function to generate this from a Location.
A lot of this is basic arithmetic, but it's easy to go wrong with sign errors and off-by-one errors!
data CellCoordinates = CellCoordinates
  { cellCenter :: Point
  , cellTopLeft :: Point
  , cellTopRight :: Point
  , cellBottomRight :: Point
  , cellBottomLeft :: Point
  }

-- First param: (X, Y) offset from the center of the display to center of (0, 0) cell
-- Second param: Full width of a cell
locationToCoords :: (Float, Float) -> Float -> Location -> CellCoordinates
locationToCoords (xOffset, yOffset) cellSize (x, y) = CellCoordinates
  (centerX, centerY)
  (centerX - halfCell, centerY + halfCell) -- Top Left
  (centerX + halfCell, centerY + halfCell) -- Top Right
  (centerX + halfCell, centerY - halfCell) -- Bottom Right
  (centerX - halfCell, centerY - halfCell) -- Bottom Left
  where
    (centerX, centerY) = (xOffset + (fromIntegral x) * cellSize, yOffset - (fromIntegral y) * cellSize)
    halfCell = cellSize / 2.0
Now we need to use these calculations to draw pictures based on the state of our world. First, let's write a conversion that factors in the specifics of the display, which allows us to pinpoint the center of the player marker.
drawingFunc :: World -> Picture
drawingFunc world =
  ...
  where
    conversion = locationToCoords (-75, 75) 50
    (px, py) = cellCenter (conversion (playerLocation world))
Now we can draw a circle to represent that! We start by making a Circle that is 10 pixels in diameter. Then we translate it by the coordinates. Finally, we'll color it red. We can add this to a list of Pictures we'll return.
drawingFunc :: World -> Picture
drawingFunc world = Pictures
  [ playerMarker ]
  where
    -- Player Marker
    conversion = locationToCoords (-75, 75) 50
    (px, py) = cellCenter (conversion (playerLocation world))
    playerMarker = Color red (translate px py (Circle 10))
Now we'll make Polygon elements to represent special positions on the board. Using the corner elements from CellCoordinates, we can draw a blue square for the start position and a green square for the final position.
drawingFunc :: World -> Picture
drawingFunc world = Pictures
  [startPic, endPic, playerMarker ]
  where
    -- Player Marker
    conversion = locationToCoords (-75, 75) 50
    (px, py) = cellCenter (conversion (playerLocation world))
    playerMarker = Color red (translate px py (Circle 10))

    # Start and End Pictures
    (CellCoordinates _ stl str sbr sbl) = conversion (startLocation world)
    startPic = Color blue (Polygon [stl, str, sbr, sbl])
    (CellCoordinates _ etl etr ebr ebl) = conversion (endLocation world)
    endPic = Color green (Polygon [etl, etr, ebr, ebl])
Finally, we do the same thing with our walls. First we have to filter all the elements in the grid to get the walls. Then we must make a function that will take the location and make the Polygon picture. Finally, we combine all of these into one picture by using a Pictures list, mapped over these walls. Here's the final look of our function:
drawingFunc :: World -> Picture
drawingFunc world = Pictures
  [gridPic, startPic, endPic, playerMarker ]
  where
    -- Player Marker
    conversion = locationToCoords (-75, 75) 50
    (px, py) = cellCenter (conversion (playerLocation world))
    playerMarker = Color red (translate px py (Circle 10))

    # Start and End Pictures
    (CellCoordinates _ stl str sbr sbl) = conversion (startLocation world)
    startPic = Color blue (Polygon [stl, str, sbr, sbl])
    (CellCoordinates _ etl etr ebr ebl) = conversion (endLocation world)
    endPic = Color green (Polygon [etl, etr, ebr, ebl])

    # Drawing the Pictures for the Walls
    walls = filter (\(_, w) -> w == Wall) (A.assocs $ worldGrid world)
    mapPic (loc, _) = let (CellCoordinates _ tl tr br bl) = conversion loc
                          in Color black (Polygon [tl, tr, br, bl])
    gridPic = Pictures (map mapPic walls)
And now when we play the game, we'll see our circle navigate to the goal square!

Next time, we'll look at a more complicated version of this kind of game world!
AI Revisited: Breaking Down BFS

So we're approaching the end of the year, and of all the topics that I've tended to focus on in my writings, there's one that I haven't really written about in probably over a year, and this is AI and Machine Learning. I've still been doing some work behind the scenes, as you'll know if you keep following the blog for the next few weeks. But I figured I'd spend the last few weeks of the year with some AI related topics. This week, I'll go over an algorithm that is really useful to understand when it comes to writing simple AI programs, and this is Breadth-First-Search.
All the code for the next few weeks can be found in this GitHub repository! For this week, all the code can be found in the BFS module.
The Algorithm
To frame this problem in a more concrete way, let's imagine we have a 2-dimensional grid. Some spaces are free, other spaces are "walls". We want to use breadth first search to find a path from a start point to a destination point.
a___
_xx_
_xb_
____
So our algorithm will take two locations, and return a path from location A to Location B, or an empty list if no path can be found.
The key data structure when executing a breadth-first-search is a queue. Our basic approach is this: we will place our starting location in the queue. Then, we'll go through a loop as long as the queue is not empty. We'll pull an item off, and then add each of the empty neighbors on to the back of the queue, as long as they haven't been added yet. If we dequeue the destination, we're done! But if we reach an empty queue, then we don't have a valid path.
The last tricky part is that we to track the "parent" of each location. That is, which of its neighbors placed it on the queue? This will allow us to reconstruct the path we need to take to get from point a to point b.
So let's imagine we have a simple graph like in the ASCII art above. We start at (0,0). Our queue will operate like this.
It contains (0,0). We'll then enqueue (0, 1) and (1, 0), since those are the neighbors of (0, 0).
(0, 0) <-- Current
(0, 1)
(1, 0)
Then we're done with (0, 0). So we dequeue (0, 1). This its only neighbor is (0, 2), so that gets placed on the end of the queue.
(0, 1) <-- Current
(1, 0)
(0, 2)
And then we repeat the process with (1, 0), placing (0, 2).
(1, 0) <-- Current
(0, 2)
(2, 0)
We keep doing this until we navigate around to our destination at (2,2).
Types First
How do we translate this to Haskell? My favorite approach to problems like this is to use a top-down, type driven, compile-first method of writing the algorithm. Because before we can really get started in earnest, we have to define our data structures and our types. First, let's alias an integer tuple as a "Location":
type Location = (Int, Int)Now, we're going to imagine we're navigating a 2D grid, and we'll represent this with an array where the indices are tuples which represent locations, and each value is either "empty" or "wall". We can move through empty spaces, but we cannot move through walls.
data Cell = Empty | Wall
  deriving (Eq)
type Grid = A.Array Location Cell
Now we're ready to define the type signature for our function. This takes the grid as an input, as well as the start and end location:
bfsSearch :: Grid -> Location -> Location -> [Location]We'll need one more type to help frame the problem. This algorithm will use the State monad, because there's a lot of state we need to track here. First off, we need the queue itself. We represent this with the Sequence type in Haskell. Then, we need our set of visited locations. Each time we enqueue a location, we'll save it here. Last, we need our "parents" map. This will help us determine the path at the very end.
data BFSState = BFSState
  { queue :: S.Seq Location
  , visited :: Set.Set Location
  , parents :: M.Map Location Location
  }
A Stateful Skeleton
With these types, we can start framing the problem a bit more. First, we want to construct our initial state. Everything is empty except our queue has the starting location on it.
bfsSearch :: Grid -> Location -> Location -> [Location]
bfsSearch grid start finish = ...
  where
    initialState = BFSState (S.singleton start) Set.empty M.empty
Now we want to pass this function to a stateful computation that returns our list. So we'll imagine we have a helper in the State monad which returns our location. We'll call this bfsSearch'. We can then fill in our original function with evalState.
bfsSearch :: Grid -> Location -> Location -> [Location]
bfsSearch grid start finish = evalState (bfsSearch' grid finish) initialState
  where
    initialState = BFSState (S.singleton start) Set.empty M.empty

bfsSearch' :: Grid -> Location -> State BFSState [Location]
...
Base Case
Now within our stateful helper, we can recognize that this will be a recursive function. We dequeue an element, enqueue its neighbors, and then repeat the process. So let's handle the base cases first. We'll retrieve our sequence from the state and check if it's empty or not. If it's empty, we return the empty list. This means that we couldn't find a path.
bfsSearch' :: Grid -> Location -> State BFSState [Location]
bfsSearch' grid finish = do
  (BFSState q v p) <- get
  case S.viewl q of
    (top S.:< rest) -> ...
    _ -> return []
Now another base case is where the top of our queue is the destination. In this case, we're ready to "unwind" the path from that destination in our stateful map. Let's imagine we have a function to handle this unwinding process. We'll fill it in later.
bfsSearch' :: Grid -> Location -> State BFSState [Location]
bfsSearch' grid finish = do
  (BFSState q v p) <- get
  case S.viewl q of
    (top S.:< rest) -> if top == finish
      then return (unwindPath p [finish])
      else ...
    _ -> return []

unwindPath :: M.Map Location Location -> [Location] -> [Location]
The General Case
Now let's write out the steps for our general case.
- Get the neighbors of the top element on the queue
- Append these to the "rest" of the queue (discarding the top element).
- Insert this top element into our "visited" set
v. - For each new location, insert it into our "parents" map with the current top as its "parent".
- Update our final state and recurse!
Each of these statements is 1-2 lines in our function, except we'll want to make a helper for the first line. Let's imagine we have a function that can give us the unvisited neighbors of a space in our grid. This will require passing the location, the grid, and the visited set.
let valid adjacent = getValidNeighbors top grid v
...

getValidNeighbors ::
  Location -> Grid -> Set.Set Location -> [Location]
The next lines involve data structure manipulation, with a couple tricky folds. First, appending the new elements into the queue.
let newQueue = foldr (flip (S.|>)) rest validAdjacentNext, inserting the top into the visited set. This one's easy.
let newVisited = Set.insert top vNow, insert each new neighbor into the parents map. The new location is the "key", and the current top is the value.
let newParentsMap = foldr (\loc -> M.insert loc top) p validAdjacentLast of all, we replace the state and recurse!
put (BFSState newQueue newVisited newParentsMap)
bfsSearch' grid finish
Here's our complete function!
bfsSearch' :: Grid -> Location -> State BFSState [Location]
bfsSearch' grid finish = do
  (BFSState q v p) <- get
  case S.viewl q of
    (top S.:< rest) -> if top == finish
      then return (unwindPath p [finish])
      else do
        let validAdjacent = getValidNeighbors top grid v
        let newQueue = foldr (flip (S.|>)) rest validAdjacent
        let newVisited = Set.insert top v
        let newParentsMap = foldr (\loc -> M.insert loc top) p validAdjacent
        put (BFSState newQueue newVisited newParentsMap)
        bfsSearch' grid finish
    _ -> return []
Filling in Helpers
Now we just need to fill in our helper functions. Unwinding the map is a fairly straightforward tail-recursive problem. We get the parent of the current element, and keep an accumulating list of the places we've gone:
unwindPath :: M.Map Location Location -> [Location] -> [Location]
unwindPath parentsMap currentPath = case M.lookup (head currentPath) parentsMap of
  Nothing -> tail currentPath
  Just parent -> unwindPath parentsMap (parent : currentPath)
Finding the neighbors is slightly tricker. For each direction (right, down, left, and right), we have to consider if the "neighbor" cell is in bounds. Then we have to consider if it's empty. Finally, we need to know if it is still "unvisited". As long as all three of these conditions hold, we can potentially add it. Here's what this process looks like for finding the "right" neighbor.
getValidNeighbors :: Location -> Grid -> Set.Set Location -> [Location]
getValidNeighbors (r, c) grid v = ...
  where
    (rowMax, colMax) = snd . A.bounds $ grid
    right = (r, c + 1)
    right' = if c + 1 <= colMax && grid A.! right == Empty && not (Set.member right v)
      then Just right
      else Nothing
We do this in every direction, and we'll use catMaybes so we only get the correct ones in the end!
getValidNeighbors :: Location -> Grid -> Set.Set Location -> [Location]
getValidNeighbors (r, c) grid v = catMaybes [right', down', left', up']
  where
    (rowMax, colMax) = snd . A.bounds $ grid
    right = (r, c + 1)
    right' = if c + 1 <= colMax && grid A.! right == Empty && not (Set.member right v)
      then Just right
      else Nothing
    down = (r + 1, c)
    down' = if r + 1 <= rowMax && grid A.! down == Empty && not (Set.member down v)
      then Just down
      else Nothing
    left = (r, c - 1)
    left' = if c - 1 >= 0 && grid A.! left == Empty && not (Set.member left v)
      then Just left
      else Nothing
    up = (r - 1, c)
    up' = if r - 1 >= 0 && grid A.! up == Empty && not (Set.member up v)
      then Just up
      else Nothing
Conclusion
This basic structure can also be adapted to use depth-first search as well! The main difference is that you must treat the Sequence as a stack instead of a queue, appending new items to the left side of the sequence. Both of these algorithms are guaranteed to find a path if it exists. But BFS will find the shortest path in this kind of scenario, whereas DFS probably won't!
Next week, we'll continue a basic AI exploration by putting this algorithm to work in a game environment with Gloss!
Monads want to be Free!
(This post is also available as a YouTube video)!
In last week's article I showed how we can use monad classes to allow limited IO effects in our functions. That is, we can get true IO functionality for something small (like printing to the terminal), without allowing a function to run any old IO action (like reading from the file system). In this way monad classes are the building blocks of Haskell's effect structures.
But there's another idea out there called "free monads". Under this paradigm, we can represent our effects with a data type, rather than a typeclass, and this can be a nicer way to conceptualize the problem. In this article I'll show how to use free monads instead of monad classes in the same Nim game example we used last time.
The "starter" code for this article is on the monad-class branch here.
The "ending" code is on the eff branch.
And here is a pull request showing all the edits we'll make!
Intro to Free Monads
Free monads are kind of like Haskell Lenses in that there are multiple implementations out there for the same abstract concept. I'm going to use the Freer Effects library. If you use a different implementation, the syntax details might be a bit different, but the core ideas should still be the same.
The first thing to understand about using free monads, at least with this library, is that there's only a single monad, which we call the Eff monad. And to customize the behavior of this monad, it's parameterized by a type level list containing different effects. Now, we can treat any monad like an effect. So we can construct an instance of this Eff monad that contains the State monad over our game state, as well as the IO monad.
playGame :: Eff '[State (Player, Int), IO ] PlayerNow in order to use monadic functionality within our Eff monad, we have the use the send function. So let's write a couple helpers for the state monad to demonstrate this.
getState :: (Member (State (Player, Int)) r) => Eff r (Player, Int)
getState = send (get :: State (Player, Int) (Player, Int))

putState :: (Member (State (Player, Int)) r) => (Player, Int) -> Eff r ()
putState = send . (put :: (Player, Int) -> State (Player, Int) ())
Whereas a typical monad class function won't specify the complete monad m, in this case, we won't specify the complete effect list. We'll just call it r. But then we'll place what is called a Member constraint on this function. We'll say that State (Player, Int) must be a "member" of the effect list r. Then we can just use send in conjunction with the normal monadic functions. We can also add in some type specifiers to make things more clear for the compiler.
Creating an Effect Type
But now let's think about our MonadTerminal class from last time. This doesn't correspond to a concrete monad, so how would we use it? The answer is that instead of using a typeclass, we're going to make a data type representing this effect, called Terminal. This will be a generalized algebraic data type, or GADT. So its definition actually kind of does look like a typeclass. Notice this seemingly extra a parameter as part of the definition.
data Terminal a where
  LogMessage :: String -> Terminal ()
  GetInputLine :: Terminal String
Now we capitalized our function names to make these data constructors. So let's write functions now under the original lowercase names that will allow us to call these constructors. These functions will look a lot like our state functions. We'll say that Terminal must be a member of the type list r. And then we'll just use send except we'll use it with the appropriate constructor for our effect type.
logMessage :: (Member Terminal r) => String -> Eff r ()
logMessage = send . LogMessage

getInputLine :: (Member Terminal r) => Eff r String
getInputLine = send GetInputLine
Interpretations
At this point, you're probably wondering "hmmmm...when do we make these functions concrete"? After all, we haven't used putStrLn yet or anything like that. The answer is that we write an interpretation of the effect type, using a particular monad. This function will assume that our Terminal effect is on top of the effect stack, and it will "peel" that layer off, returning an action that no longer has the effect on the stack.
We call this function runTerminalIO because for this interpretation, we'll assume we are using the IO monad. And hence we will add a constraint that the IO monad is on the remaining stack r.
runTerminalIO :: (Member IO r) => Eff (Terminal ': r) a -> Eff r a
runTerminalIO = ...
To fill in this function, we create a natural transformation between a Terminal action and an IO action. For the LogMessage constructor of course we'll use putStrLn, and for GetInputLine we'll use getLine.
runTerminalIO :: (Member IO r) => Eff (Terminal ': r) a -> Eff r a
runTerminalIO = ...
  where
    terminalToIO :: Terminal a -> IO a
    terminalToIO (LogMessage msg) = putStrLn msg
    terminalToIO GetInputLine = getLine
Then to complete the function, we use runNat, a library function, together with this transformation.
runTerminalIO :: (Member IO r) => Eff (Terminal ': r) a -> Eff r a
runTerminalIO = runNat terminalToIO
  where
    terminalToIO :: Terminal a -> IO a
    terminalToIO (LogMessage msg) = putStrLn msg
    terminalToIO GetInputLine = getLine
Interpreting the Full Stack
Now our complete effect stack will include this Terminal effect, the State effect, and the IO monad. This final stack is like our GameMonad. We'll need to write a concrete function to turn this in to a normal IO action.
transformGame :: Eff '[ Terminal, State (Player, Int), IO ] a -> IO a
transformGame = runM . (runNatS (Player1, 0) stateToIO) . runTerminalIO
  where
    stateToIO :: (Player, Int) -> State (Player, Int) a -> IO ((Player, Int), a)
    stateToIO prev act = let (a', nextState) = runState act prev in return (nextState, a')
This function is a bit like our other interpretation function in that it includes a transformation of the state layer. We combine this with our existing runTerminalIO function to get the final interpretation. Instead of runNat, we use runNatS to assign an initial state and allow that state to pass through to other calls.
Final Tweaks
And now there are just a few more edits we need to make. Most importantly, we can change the type signatures of our different functions. They should be in the Eff monad, and for every monad class constraint we used before, we'll now include a Member constraint.
playGame :: Eff '[ Terminal, State (Player, Int), IO ] Player

validateMove :: (Member Terminal r, Member (State (Player, Int)) r) => String -> Eff r (Maybe Int)

promptPlayer :: (Member Terminal r, Member (State (Player, Int)) r) => Eff r ()

readInput :: (Member Terminal r) => Eff r String
That's most all of what we need to do! We also have to change the direct get and put calls to use getState and putState, but that's basically it! We can rebuild and play our game again now!
Conclusion: Effectful Haskell!
Now I know this overview was super quick so I could barely scratch the surface of how free monads work and what their benefits are. If you think these sound really cool though, and you want to learn this concept more in depth and get some hands on experience, you should sign up for our Effectful Haskell Course!
This course will teach you all the ins and outs of how Haskell allows you to structure effects, including how to do it with free monads. You'll get to see how these ideas work in the context of a decently-sized project. Even better is that you can get a 20% discount on it by subscribing to Monday Morning Haskell. So don't miss out, follow that link and get learning today!
Using IO without the IO Monad!

(This post is also available as a YouTube video!)
In last week's article, I explained what effects really are in the context of Haskell and why Haskell's structures for dealing with effects are really cool and distinguish it from other programming languages.
Essentially, Haskell's type system allows us to set apart areas of our code that might require a certain effect from those that don't. A function within a particular monad can typically use a certain effect. Otherwise, it can't. And we can validate this at compile time.
But there seems to be a problem with this. So many of Haskell's effects all sort of fall under the umbrella of the IO monad. Whether that's printing to the terminal, or reading from the file system, using threads and concurrency, connecting over the network, or even creating a new random number generator.
putStrLn :: String -> IO ()
readFile :: FilePath -> IO String
readMVar :: MVar a -> IO a
httpJSON :: (MonadIO m, FromJSON a) => Request -> m (Response a)
getStdGen :: MonadIO m => m StdGen
Now I'm not going to tell you "oh just re-write your program so you don't need as much IO." These activities are essential to many programs. And often, they have to be spread throughout your code.
But the IO monad is essentially limitless in its abilities. If your whole program uses the IO monad, you essentially don't have any of the guarantees that we'd like to have about limiting side effects. If you need any kind of IO, it seems like you have to allow all sorts of IO.
But this doesn't have to be the case. In this article we're going to demonstrate how we can get limited IO effects within our function. That is, we'll write our type signature to allow a couple specific IO actions, without opening the door to all kinds of craziness. Let's see how this works.
An Example Game
Throughout this video we're going to be using this Nim game example I made. You can see all the code in Game.hs.
Our starting point for this article is the instances branch.
The ending point is the monad-class branch.
You can take a look at this pull request to see all the changes we're going to make in this article!
This program is a simple command line game where players are adding numbers to a sum and want to be the one to get to exactly 100. But there are some restrictions. You can't add more than 10, or add a negative number, or add too much to put it over 100. So if we try to do that we get some of these helpful error messages. And then when someone wins, we see who that is.
Our Monad
Now there's not a whole lot of code to this game. There are just a handful of functions, and they mostly live in this GameMonad we created. The "Game Monad" keeps track of the game state (a tuple of the current player and current sum value) using the State monad. Then it also uses the IO monad below that, which we need to receive user input and print all those messages we were seeing.
newtype GameMonad a = GameMonad
  { gameAction :: StateT (Player, Int) IO a
  } deriving (Functor, Applicative, Monad)
We have a couple instances, MonadState, and MonadIO for our GameMonad to make our code a bit simpler.
instance MonadIO GameMonad where
  liftIO action = GameMonad (lift action)

instance MonadState (Player, Int) GameMonad where
  get = GameMonad get
  put = GameMonad . put
Now the drawback here, as we talked about before, is that all these GameMonad functions can do arbitrary IO. We just do liftIO and suddenly we can go ahead and read a random file if we want.
playGame :: GameMonad Player
playGame = do
  promptPlayer
  input <- readInput
  validateResult <- validateMove input
  case validateResult of
    Nothing -> playGame
    Just i -> do
      # Nothing to stop this!
      readResult <- liftIO $ readFile "input.txt"
      ...
Making Our Own Class
But we can change this with just a few lines of code. We'll start by creating our own typeclass. This class will be called MonadTerminal. It will have two functions for interacting with the terminal. First, logMessage, that will take a string and return nothing. And then getInputLine, that will return a string.
class MonadTerminal m where
  logMessage :: String -> m ()
  getInputLine :: m String
How do we use this class? Well we have to make a concrete instance for it. So let's make an instance for our GameMonad. This will just use liftIO and run normal IO actions like putStrLn and getLine.
instance MonadTerminal GameMonad where
  logMessage = liftIO . putStrLn
  getInputLine = liftIO getLine
Constraining Functions
At this point, we can get rid of the old logMessage function, since the typeclass uses that name now. Next, let's think about the readInput expression.
readInput :: GameMonad String
readInput = liftIO getLine
It uses liftIO and getLine right now. But this is exactly the same definition we used in MonadTerminal. So let's just replace this with the getInputLine class function.
readInput :: GameMonad String
readInput = getInputLine
Now let's observe that this function no longer needs to be in the GameMonad! We can instead use any monad m that satisfies the MonadTerminal constraint. Since the GameMonad does this already, there's no effect on our code!
readInput :: (MonadTerminal m) => m String
readInput = getInputLine
Now we can do the same thing with the other two functions. They call logMessage and readInput, so they require MonadTerminal. And they call get and put on the game state, so they need the MonadState constraint. But after doing that, we can remove GameMonad from the type signatures.
validateMove :: (MonadTerminal m, MonadState (Player, Int) m) => String -> m (Maybe Int)
...

promptPlayer :: (MonadTerminal m, MonadState (Player, Int) m) => m ()
...
And now these functions can no longer use arbitrary IO! They're still using using the true IO effects we wrote above, but since MonadIO and GameMonad aren't in the type signature, we can't just call liftIO and do a file read.
Of course, the GameMonad itself still has IO on its Monad stack. That's the only way we can make a concrete implementation for our Terminal class that actually does IO!
But the actual functions in our game don't necessarily use the GameMonad anymore! They can use any monad that satisfies these two classes. And it's technically possible to write instances of these classes that don't use IO. So the functions can't use arbitrary IO functionality! This has a few different implications, but it especially gives us more confidence in the limitations of what these functions do, which as a reminder, is considered a good thing in Haskell! And it also allows us to test them more easily.
Conclusion: Effectful Haskell
Hopefully you think at least that this is a cool idea. But maybe you're thinking "Woah, this is totally game changing!" If you want to learn more about Haskell's effect structures, I have an offer for you!
If you head to this page you'll learn about our Effectful Haskell course. This course will give you hands-on experience working with the ideas from this video on a small but multi-functional application. The course starts with learning the different layers of Haskell's effect structures, and it ends with launching this application on the internet.
It's really cool, and if you've read this long, I think you'll enjoy it, so take a look! As a bonus, if you subscribe to Monday Morning Haskell, you can get a code for 20% off on this or any of our courses!
Why Haskell?

(This post is also available as a YouTube video!)
When I tell other programmers I do a lot of programming in Haskell, a common question is "Why"? What is so good about Haskell that it's worth learning a language that is so different from the vast majority of software. And there are a few different things I usually think of, but the biggest one that sticks out for me is the way Haskell structures effects. I think these structures have really helped me change the way I think about programming, and knowing these ideas has made me a more effective developer, even in other languages.
Defining Effects
Now you might be wondering, what exactly is an effect? Well to describe effects, let's first think about a "pure" function. A pure function has no inputs besides the explicit parameters, and the only way it impacts our program's behavior is through the value it returns.
// A simple, pure, function
public int addWith5(int x, int y) {
  int result = x + y + 5;
  return result;
}
We can define an effect as, well, anything outside of that paradigm. This can be as simple as an implicit mutable input to the function like a global variable.
// Global mutable variable as in "implicit" input
global int z;

public int addWith5(int x, int y) {
  int result = x + y + 5 + z; // < z isn't a function parameter!
  return result;
}
Or it can be something more complicated like writing something to the file system, or making an HTTP request to an API.
// More complicated effects (pseudo-code)
public int addWith5(int x, int y) {
  int result = x + y + 5;
  WriteFile("result.txt", result);
  API.post(makeRequest(result));
  return result;
}
Once our function does these kinds of operations, its behavior is significantly less predictable, and that can cause a lot of bugs.
Now a common misconception about Haskell is that it does not allow side effects. And this isn't correct. What is true about Haskell is that if a function has side effects, these must be part of its type signature, usually in the form of a monad, which describes the full computational context of the function.
A function in the State monad can update a shared global value in some way.
updateValue :: Int -> State Int IntA function in the IO monad can write to the file system or even make a network call.
logAndSendRequest :: Req -> IO ResultDoing this type-level documentation helps avoid bugs and provide guarantees about parts of our program at compile time, and this can be a real lifesaver.
Re-thinking Code
In the last few years I've been writing about Haskell during my free time but using C++ and Python in my day job. And so I have a bigger appreciation for the lessons I learned from Haskell's effect structures and I've seen that my code in other languages is much better because I understand these lessons.
New Course: Effectful Haskell!
And this is why I'm excited to introduce my newest course on the Monday Morning Haskell Academy. This one is called Effectful Haskell, and I think it might be the most important course I've made so far, because it really zeroes in on this idea of effects. For me, this is the main idea that separates Haskell from other languages. But at the same time, it can also teach you to be a better programmer in these other languages.
This course is designed to give you hands-on experience with some of the different tools and paradigms Haskell has for structuring effects. It includes video lectures, screencasts, and in depth coding exercises that culminate with you launching a small but multi-functional web server.
If you've dabbled a bit in Haskell and you understand the core ideas, but you want to see what the language is really capable of, I highly recommend you try out this course. You can head to the course sales page to see an overview of the course as well as the FAQ. I'll mention a couple special items.
First, there is a 30-day refund guarantee if you decide you don't like the course.
And second, if you subscribe (or are already subscribed) to the Monday Morning Haskell newsletter, you'll get a 20% discount code for this and our other courses! So I hope you'll take a look and try it out.
Haskellings Demo Video!
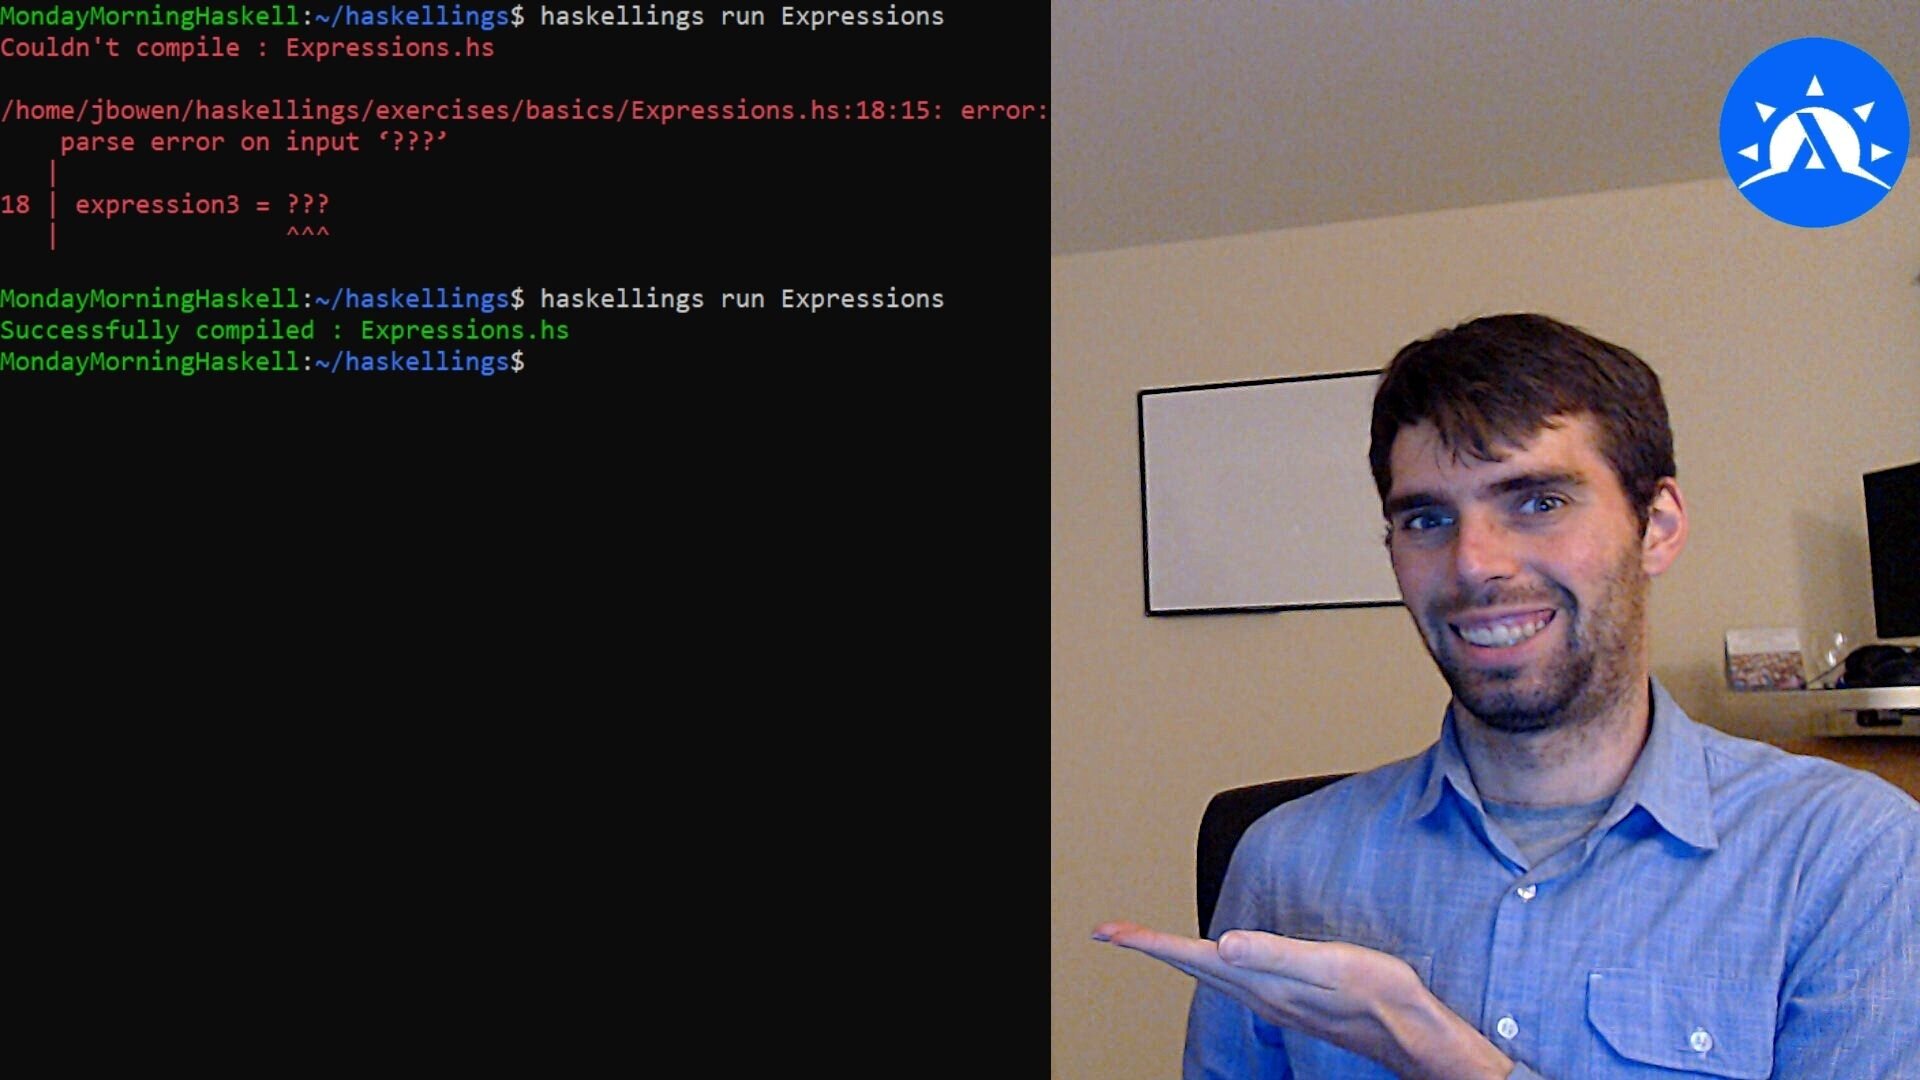
If you've been following my Twitch stream, you know I've been continuing to work quite a bit on the Haskellings automated tutorial. This week I'm releasing a short YouTube video demonstrating how to get started with this program and use it! If you've been waiting for the kick to get started with learning Haskell, this is it! Download Haskellings and get started!
And if you like it, don't forget to subscribe to Monday Morning Haskell for our subscriber-only resources!
Hpack in Video Form!

For a couple more weeks we'll be continuing with videos from recent streams! As a reminder you can catch me streaming on Twitch every Monday at 7:30 pm PDT (UTC-07). In the latest video, I walk through refactoring Haskellings to use Hpack instead of relying on the normal .cabal file format. Enjoy!
New Quicksort Video!

This week we've got a new video out! It goes in depth into the Quicksort algorithm. We compare implementations in Haskell and Python, and also consider what it really means for us to have an "In Place" algorithm that mutates our data.
I've written about this topic before, so check out these articles if you prefer written content!
But this new video includes some neat visuals showing Quicksort in action, so check it out!
Fixing Haskellings Filepaths
Hey folks! I'm experimenting with a new content format for Monday Morning Haskell. Every Monday Evening now, I'm going to stream myself writing some Haskell or working on a Haskell problem, and then the following Monday I'll post an overview of that stream on YouTube.
Last week was the first streaming session, where I was working on an issue with Haskellings. So this video will have some highlights from that. For broader context, I was looking to replace some custom functions I had built for filepath manipulation with the more well tested System.Filepath library.
This being the first stream, I hope you'll understand things are still a bit rough around the edges, but I hope you enjoy it! If you want to tune in to watch me on Monday Evenings, head over to my Twitch page!
Monday Evening Haskell!

We have an exciting announcement this week! Tonight, I'll be trying out a new form of content. I'll be streaming myself writing some Haskell. This will likely be a weekly event for quite a while. To see some Haskell in action, head to our Twitch Stream page from 7:30 PM until 9:30 PM Pacific Daylight Time (UTC-7).
Tonight's focus will be on updating Haskellings to use a library for file paths instead of its current custom system. The next few weeks will probably also be centered around Haskellings, but I'll also venture into some areas, like trying out some example coding problems with Haskell. I'll also change around the streaming time to give a chance to followers from around the world.
So don't miss out, head to our Twitch page, follow us, and tune in tonight at 7:30!
Summer Sale Ending!

Today is the last day of the Monday Morning Haskell summer sale! If you subscribe today, you'll get a discount code to use on all of our courses! This includes our new Making Sense of Monads course. If you're relatively new to Haskell, this is a great way to learn about this tricky topic that's a stumbling block for many newcomers. It's a short, one-module course covering these topics:
- Starting out with simpler functional structures (e.g. Functors)
- The syntactic elements involved in writing monadic functions
- The most common monads and how to combine them
- Bonus challenges to test your knowledge
You can get a closer overview of the content on the course page here. You can also look at our full course listings here. And if you subscribe today (July 26th) you'll get a discount code for all these courses! So don't wait!
Hidden Identity: Using the Identity Monad
Last week we announced our new Making Sense of Monads course. If you subscribe to our mailing list in the next week, you can get a special discount for this and our other courses! So don't miss out!
But in the meantime, we've got one more article on monads! Last week, we looked at the "Function monad". This week, we're going to explore another monad that you might not think about as much. But even if we don't specifically invoke it, this monad is actually present quite often, just in a hidden way! Once again, you can watch the video to learn more about this, or just read along below!
On its face, the identity monad is very simple. It just seems to wrap a value, and we can retrieve this value by calling runIdentity:
newtype Identity a = Identity { runIdentity :: a }So we can easily wrap any value in the Identity monad just by calling the Identity constructor, and we can unwrap it by calling runIdentity.
We can write a very basic instance of the monad typeclass for this type, that just incorporates wrapping and unwrapping the value:
instance Monad Identity where
  return = Identity
  (Identity a) >>= f = f a
A Base Monad
So what's the point or use of this? Well first of all, let's consider a lot of common monads. We might think of Reader, Writer and State. These all have transformer variations like ReaderT, WriterT, and StateT. But actually, it's the "vanilla" versions of these functions that are the variations!
If we consider the Reader monad, this is actually a type synonym for a transformer over the Identity monad!
type Reader a = ReaderT Identity aIn this way, we don't need multiple abstractions to deal with "vanilla" monads and their transformers. The vanilla versions are the same as the transformers. The runReader function can actually be written in terms of runReaderT and runIdentity:
runReader :: Reader r a -> r -> a
runReader action = runIdentity . (runReaderT action)
Using Identity
Now, there aren't that many reasons to use Identity explicitly, since the monad encapsulates no computational strategy. But here's one idea. Suppose that you've written a transformation function that takes a monadic action and runs some transformations on the inner value:
transformInt :: (Monad m) => m Int -> m (Double, Int)
transformInt action = do
  asDouble <- fromIntegral <$> action
  tripled <- (3 *) <$> action
  return (asDouble, tripled)
You would get an error if you tried to apply this to a normal unwrapped value. But by wrapping in Identity, we can reuse this function!
>> transformInt 5
Error!
>> transformInt (Identity 5)
Identity (5.0, 15)
We can imagine the same thing with a function constraint using Functor or Applicative. Remember that Identity belongs to these classes as well, since it is a Monad!
Of course, it would be possible in this case to write a normal function that would accomplish the simple task in this example. But no matter how complex the task, we could write a version relying on the Identity monad that will always work!
transformInt' :: Int -> (Double, Int)
transformInt' = runIdentity . transformToInt . Identity

...

>> transformInt' 5
(5.0, 15)
The Identity monad is just a bit of trivia regarding monads. If you've been dying to learn how to really use monads in your own programming, you should sign up for our new course Making Sense of Monads! For the next week you can subscribe to our mailing list and get a discount on this course as well as our other courses!
Making Sense of Monads!
We have a special announcement this week! We have a new course available at Monday Morning Haskell Academy! The course is called Making Sense of Monads, and as you might expect, it tackles the concept of monads! It's a short, one module course, but it goes into a good amount of detail about this vital topic, and includes a couple challenge projects at the end. Sign up here!. If you subscribe to our mailing list, you can get a special discount on this and our other courses!
In addition to this, we've also got some new blog content! Once again, there's a video, but you can also follow along by scrolling down!
Last week we discussed the function application operator, which I used for a long time as a syntactic crutch without really understanding it. This week we'll take another look at a function-related concept, but we'll relate it to our new monads course. We're going to explore the "function monad". That is, a single-argument function can act as a monad and call other functions which take the same input in a monadic fashion. Let's see how this works!
The Structure of Do Syntax
Let's start by considering a function in a more familiar monad like IO. Here's a function that queries the user for their name and writes it to a file.
ioFunc :: IO ()
ioFunc = do
  putStrLn "Please enter your name"
  name <- getLine
  handle <- openFile "name.txt" WriteMode
  hPutStrLn handle name
  hClose handle
Do syntax has a discernable structure. We can see this when we add all the type signatures in:
ioFunc :: IO String
ioFunc = do
  putStrLn "Please enter your name" :: IO ()
  (name :: String) <- getLine :: IO String
  (handle :: Handle) <- openFile "name.txt" WriteMode :: IO Handle
  hPutStrLn handle name :: IO ()
  hClose handle :: IO ()
  return name :: IO String
Certain lines have no result (returning ()), so they are just IO () expressions. Other lines "get" values using <-. For these lines, the right side is an expression IO a and the left side is the unwrapped result, of type a. And then the final line is monadic and must match the type of the complete expression (IO String in this case) without unwrapping it's result.
Here's how we might expression that pattern in more general terms, with a generic monad m:
combine :: a -> b -> Result

monadFunc :: m Result
monadFunc = do
  (result1 :: a) <- exp1 :: m a
  (result2 :: b) <- exp2 :: m b
  exp3 :: m ()
  return (combine result1 result2) :: m Result
Using a Function
It turns out there is also a monad instance for (->) r, which is to say, a function taking some type r. To make this more concrete, let's suppose the r type is Int. Let's rewrite that generic expression, but instead of expressions like m Result, we'll instead have Int -> Result.
monadFunc :: Int -> Result
monadFunc = do
  (result1 :: a) <- exp1 :: Int -> a
  (result2 :: b) <- exp2 :: Int -> b
  exp3 :: Int -> ()
  return (combine result1 result2) :: Int -> Result
So on the right, we see an expression "in the monad", like Int -> a. Then on the left is the "unwrapped" expression, of type a! Let's make this even more concrete! We'll remove exp3 since the function monad can't have any side effects, so a function returning () can't do anything the way IO () can.
monadFunc :: Int -> Int
monadFunc = do
  result1 <- (+) 5
  result2 <- (+) 11
  return (result1 * result2)
And we can run this function like we could run any other Int -> Int function! We don't need a run function like some other functions (Reader, State, etc.).
>> monadFunc 5
160
>> monadFunc 10
315
Each line of the function uses the same input argument for its own input!
Now what does return mean in this monadic context? Well the final expression we have there is a constant expression. It must be a function to fit within the monad, but it doesn't care about the second input to the function. Well this is the exact definition of the const expression!
const :: a -> b -> a
const a _ = a -- Ignore second input!
So we could replace return with const and it would still work!
monadFunc :: Int -> Int
monadFunc = do
  result1 <- (+) 5
  result2 <- (+) 11
  const (result1 * result2)
Now we could also use the implicit input for the last line! Here's an example where we don't use return:
monadFunc :: Int -> Int
monadFunc = do
  result1 <- (+) 5
  result2 <- (+) 11
  (+) (result1 * result2)
...

>> monadFunc 5
165
>> monadFunc 10
325
And of course, we could define multiple functions in this monad and call them from one another:
monadFunc2 :: Int -> String
monadFunc2 = do
  result <- monadFunc
  showInput <- show
  const (show result ++ " " ++ showInput)
Like a Reader?
So let's think about this monad more abstractly. This monadic unit gives us access to a single read-only input for each computation. Does this sound familiar to you? This is actually exactly like the Reader monad! And, in fact, there's an instance of the MonadReader typeclass for the function monad!
instance MonadReader r ((->) r) where
...
So without changing anything, we can actually call Reader functions like local! Let's rewrite our function from above, except double the input for the call to monadFunc:
monadFunc2 :: Int -> String
monadFunc2 = do
  result <- local (*2) monadFunc
  showInput <- show
  const (show result ++ " " ++ showInput)

...

>> func2 5
"325 5"
>> func2 10
"795 10"
This isomorphism is one reason why you might not use the function monad explicitly so much. The Reader monad is a bit more canonical and natural. But, it's still useful to have this connection in mind, because it might be useful if you have a lot of different functions that take the same input!
If you're not super familiar with monads yet, hopefully this piqued your interest! To learn more, you can sign up for Making Sense of Monads! And if you subscribe to Monday Morning Haskell you can get a special discount, so don't wait!
Function Application: Using the Dollar Sign ($)
Things have been a little quiet here on the blog lately. We've got a lot of different projects going on behind the scenes, and we'll be making some big announcements about those soon! If you want to stay up to date with the latest news, make sure you subscribe to our mailing list! You'll get access to our subscriber-only resources, including our Beginners Checklist and our Production Checklist!
The next few posts will include a video as well as a written version! So you can click the play button below, or scroll down further to read along!
Let's talk about one of the unsung heroes, a true foot soldier of the Haskell language: the function application operator, ($). I used this operator a lot for a long time without really understanding it. Let's look at its type signature and implementation:
infixr 0
($) :: (a -> b) -> a -> b
f $ a = f a
For the longest time, I treated this operator as though it were a syntactic trick, and didn't even really think about it having a type signature. And when we look at this signature, it seems really basic. Quite simply, it takes a function, and an input to that function, and applies the function.
At first glance, this seems totally unnecessary! Why not just do "normal" function application by placing the argument next to the function?
add5 :: Int -> Int
add5 = (+) 5

-- Function application operator
eleven = add5 $ 6

-- Same result as "Normal" function application
eleven' = add5 6
This operator doesn't let us write any function we couldn't write without it. But it does offer us some opportunities to organize our code a bit differently. And in some cases this is cleaner and it is more clear what is going semantically.
Grouping with $
Because its precedence is so low (level 0) this operator can let us do some kind of rudimentary grouping. This example doesn't compile, because Haskell tries to treat add5 as the second input to (+), rather than grouping it with 6, which appears to be its argument.
-- Doesn't compile!
value = (+) 11 add5 6
We can group these together using parentheses. But the low precedence of ($) also allows it to act as a "separator". We break our expression into two groups. First we add and apply the first argument, and then we apply this function with the result of add5 6.
-- These work by grouping in different ways!

value = (+) 11 $ add5 6

value' = (+) 11 (add5 6)
Other operators and function applications bind more tightly, so can have expressions like this:
value = (+) 11 $ 6 + 7 * 11 - 4A line with one $ essentially says "get the result of everything to the right and apply it as one final argument". So we calculate the result on the right (79) and then perform (+) 11 with that result.
Reordering Operations
The order of application also reverses with the function application operator as compared to normal function application. Let's consider this basic multiplication:
value = (*) 23 15Normal function application orders the precedence from left-to-right. So we apply the argument 23 to the function (*), and then apply the argument 15 to the resulting function.
However, we'll get an error if we use $ in between the elements of this expression!
-- Fails!
value = (*) $ 23 $ 15
This is because ($) orders from right-to-left. So it first tries to treat "23" as a function and apply "15" as its argument.
If you have a chain of $ operations, the furthest right expression should be a single value. Then each grouping to the left should be a function taking a single argument. Here's how we might make an example with three sections.
value = (*) 23 $ (+10) $ 2 + 3Higher Order Functions
Having an operator for function application also makes it convenient to use it with higher order functions. Let's suppose we're zipping together a list of functions with a list of arguments.
functions = [(+3), (*5), (+2)]

arguments = [2, 5, 7]
The zipWith function is helpful here, but this first approach is a little clunky with a lambda:
results = zipWith (\f a -> f a) functions argumentsBut of course, we can just replace that with the function application operator!
results = zipWith ($) functions arguments

results = [5, 25, 9]
So hopefully we know a bit more about the "dollar sign" now, and can use it more intelligently! Remember to subscribe to Monday Morning Haskell! There will be special offers for subscribers in the next few weeks, so you don't want to miss out!
Haskellings Beta!
We spent a few months last year building the groundwork for Haskellings in this YouTube series. Now after some more hard work, we're happy to announce that Haskellings is now available in the beta stage. This program is meant to be an interactive tutorial for learning the Haskell language. If you've never written a line of Haskell in your life, this program is designed to help you take those first steps! You can take a look at the Github repository to learn all the details of using it, but here's a quick overview.
Overview
Haskellings gives you the chance to write Haskell code starting from the very basics with a quick evaluation loop. It currently has 50 different exercises for you to work with. In each exercise, you can read about a Haskell concept, make appropriate modifications, and then run the code with a single command to check your work!
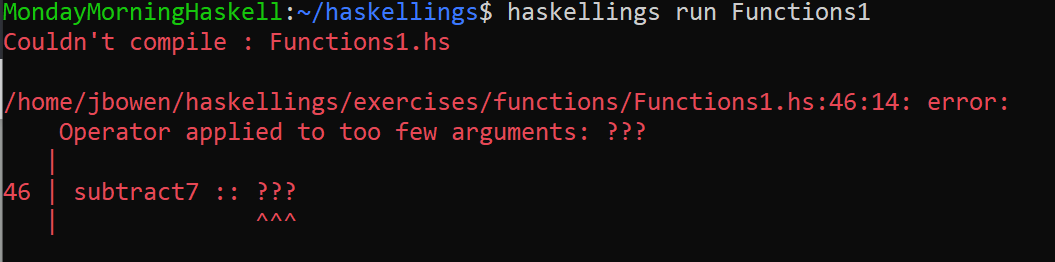

You can do exercises individually, but the easiest way to do everything in order is to run the program in Watcher mode. In this mode, it will automatically tell you which exercise is next. It will also re-run each exercise every time you save your work.

Haskellings covers a decent amount of ground on basic language concepts. It starts with the very basics of expressions, types and functions, and goes through the basic usage of monads.
Haskellings is an open source project! If you want to report issues or contribute, learn how by reading this document! So go ahead, give it a try!
Don't Forget: Haskell From Scratch
Haskellings is a quick and easy way to learn the language basics, but it only touches on the surface of a lot of elements. To get a more in-depth look at the language, you should consider our Haskell From Scratch video course. This course includes:
- Hours of video lectures explaining core language concepts and syntax
- Dozens of practice problems to help you hone your skills
- Access to our Slack channel, so you can get help and have your questions answered
- A final mini-project, to help you put the pieces together
This course will help you build a rock-solid foundation for your future Haskell learnings. And even better, we've now cut the price in half! So don't miss out!
Advanced Series Updated!

We're back again with some more site improvements, this time to our Advanced Content. All of these series now have improved syntax highlighting and code blocks for better readability. In addition, we've revised three of them with updated companion code! Here's a summary.
Real World Haskell Series
Once you've mastered the foundations of the language, this series should be your first stop! It will walk you through several different libraries demonstrating how you can perform some real-world tasks with Haskell, like connecting to a database and running a web server. You can follow along with all the code here on GitHub.
Parsing Series
As a functional language, Haskell thrives on being able to seemlessly compose smaller pieces of code together into a large, coherent whole. Parsing libraries are one area where this paradigm fits very well. In this series, we go through a few different parsing libraries and compare them. The code is available in this repository if you want to try it out yourself!
API Integrations Series
A lot of coding projects involved connected with outside services and APIs. Luckily, Haskell has a few libraries for interacting with these services! In this series, we'll explore integrations with Twilio and Mailgun so that we can send text messages and emails to your users! You can get a detailed breakdown of the code on GitHub. You can even fork the repository and run the code for yourself!
What's Coming Up?
Our next area of focus will be working on a first release of Haskellings, an interactive beginner tutorial for the language. We built this over the course of the last few months of 2020 in an extended video series that you can catch here on YouTube. The project is Open Source and currently available for contributions! Stay tuned for more updates on it!