Using Haskell in Vim: The Basics
Last week I went over some of the basic principles of a good IDE setup. Now in this article and the next, we're going to do this for Haskell in a couple different environments.
A vital component of almost any Haskell setup (at least the two we'll look at) is getting Haskell Language Server running and being able to switch your global GHC version. We covered all that in the last article with GHCup.
In this article we'll look at creating a Haskell environment in Vim. We'll cover how Vim allows us to perform all the basic actions we want, and then we'll add some of the extra Haskell features we can get from using HLS in conjunction with a plugin.
One thing I want to say up front, because I know how frustrating it can be to try repeating something from an article and have it not work: this is not an exhaustive tutorial for installing Haskell in Vim. I plan to do a video on that later. There might be extra installation details I'm forgetting in this article, and I've only tried this on Windows Subsystem for Linux. So hopefully in the future I'll have time to try this out on more systems and have a more detailed look at the requirements.
Base Features
But, for now, let's start checking off the various boxes from last week's list. We had an original list of 7 items for basic functionality. Here are five of them:
- Open a file in a tab
- Switch between tabs
- Open files side-by-side (and switch between them)
- Open up a terminal to run commands
- Switch between the terminal and file to edit
Now Vim is a textual editor, meant to be run from a command prompt or terminal. Thus you can't really use the mouse at all in Vim! This is disorienting at first, but it means that all of these actions we have to take must have keyboard commands. Once you learn all these, your coding will get much faster!
To open a new file in a tab, we would use :tabnew followed by the file name (and we can use autocomplete to get the right file). We can then flip between tabs with the commands :tabn (tab-next) and :tabp (tab-previous).
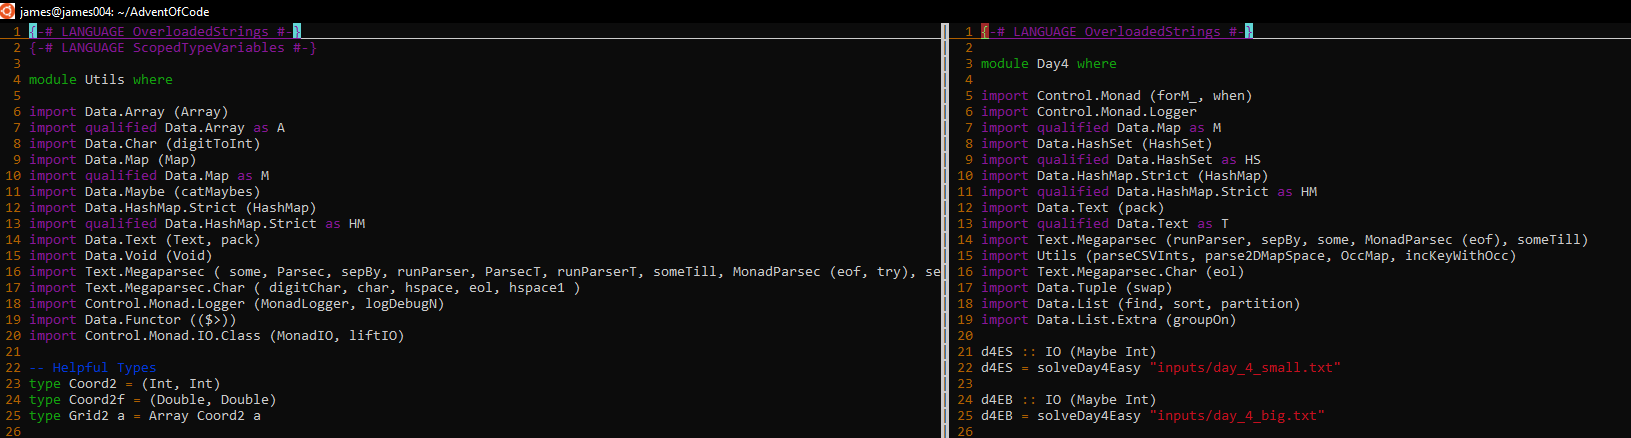
To see multiple files at the same time, we can use the :split command, followed by the file name. This gives a horizontal split. My preference is for a vertical split, which is achieved with :vs and the file name. Instead of switching between files with :tabn and :tabp, we use the command Ctrl+W to go back and forth.
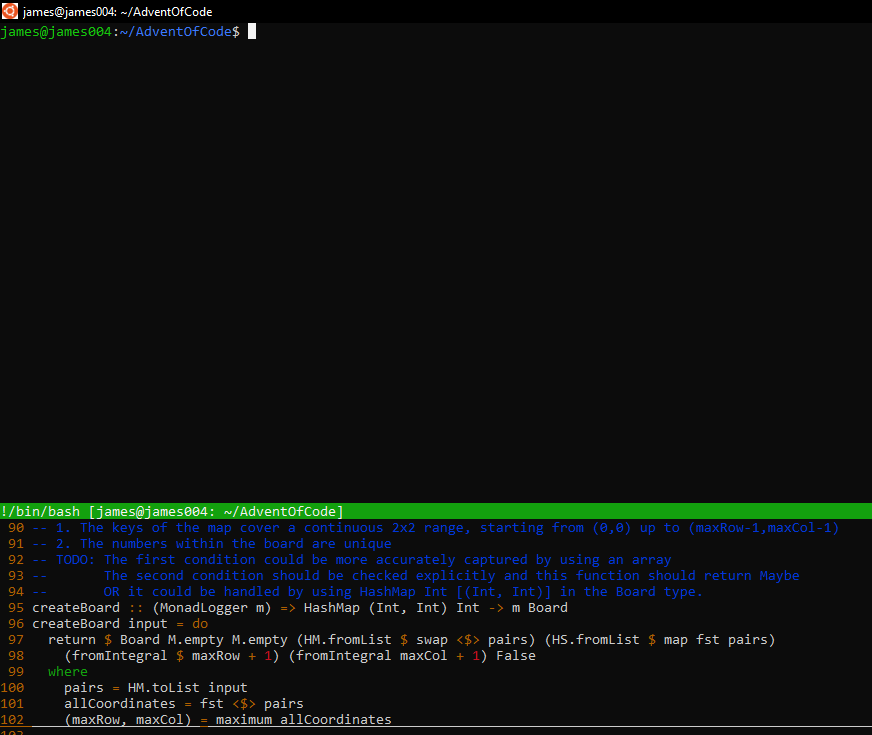
Finally, we can open a terminal using the :term command. By default, this puts the terminal at the bottom of the screen:
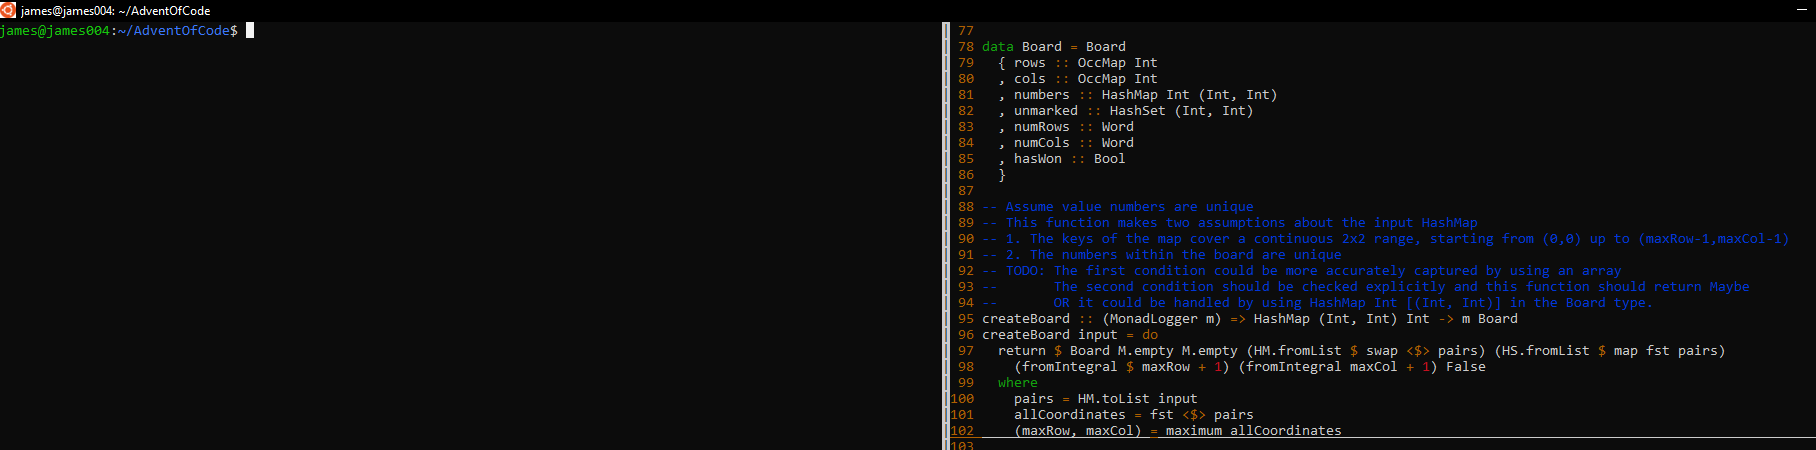
We can also get a side-by-side terminal with :vert term.
Switching between terminals is the same as switching between split screens: Ctrl+WW.
And of course, obviously, Vim has "Vim movement" keys so you can move around the file very quickly!
Sidebar Support
Now the two other items on the list are related to having a sidebar, another useful base feature in your IDE.
- Open & close a navigation sidebar
- Use sidebar to open files
We saw above that it's possible to open new files. But on larger projects, you can't keep the whole project tree in your head, so you'll probably need a graphical reference to help you.
Vim doesn't support such a layout natively. But with Vim (and pretty much every editor), there is a rich ecosystem of plugins and extensions to help improve the experience.
In fact, with Vim, there are multiple ways of installing plugins. The one I ended up deciding on is Vim Plug. I used it to install a Plugin called NerdTree, which gives a nice sidebar view where I can scroll around and open files.
In general, to make a modification to your Vim settings, you modify a file in your home directory called .vimrc. To use NerdTree (after installing Vim Plug), I just added the following lines to that file.
call plug#begin('~/.vim/plugged")
Plug 'preservim/nerdtree'
call plug#end()
Here's what it looks like:
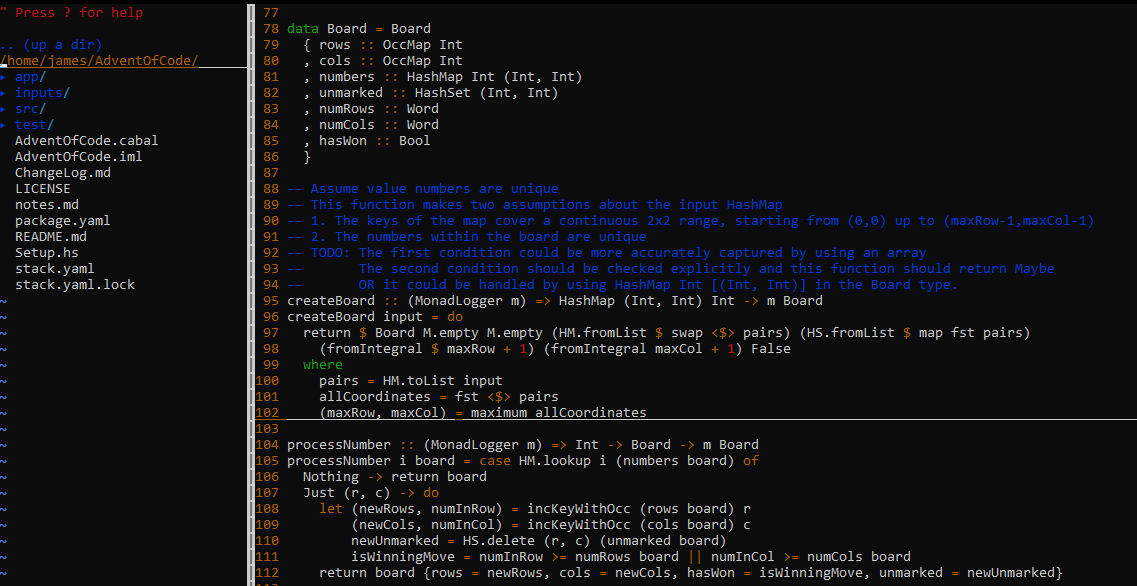
All that's needed to bring this menu up is the command :NERDTree. Switching focus remains the same with Ctrl+WW and so does closing the tab with :q.
Configurable Commands
Another key factor with IDEs is being able to remap commands for your own convenience. I found some of Vim's default commands a bit cumbersome. For example, switching tabs is a common enough task that I wanted to make it really fast. I wanted to do the same with opening the terminal, while also doing so with a vertical split instead of the default horizontal split. Finally, I wanted a shorter command to open the NerdTree sidebar.
By putting the following commands in my .vimrc file, I can get these remappings:
nnoremap <Leader>q :tabp<CR>
nnoremap <Leader>r :tabn<CR>
nnoremap <Leader>t :vert term<CR>
nnoremap <Leader>n :NERDTree<CR>
In these statements, <Leader> refers to a special key that is backslash (\) by default, but also customizable. So now I can switch tabs using \q and \r, open the terminal with \t, and open the sidebar with \n.
Language Specific Features
Now the last (and possibly most important) aspect of setting up the IDE is to get the language-specific features working. Luckily, from the earlier article, we already have the Haskell Language Server running thanks to GHCup. Let's see how to apply this with Vim.
First, we need another Vim plugin to work with the language server. This plugin is called "CoC", and we can install it by including this line in our .Vimrc in the plugins section:
call plug#begin('~/.vim/plugged')
...
Plug 'neoclide/coc.nvim', {'branch': 'release'}
call plug#end()
After installing the plugin (re-open .vimrc or :source the file), we then have to configure the plugin to use the Haskell Language Server. To do this, we have to use the :CocConfig command within Vim, and then add the following lines to the file:
{
  "languageserver": {
    "haskell": {
      "command": "haskell-language-server-wrapper",
      "args": ["--lsp"],
      "rootPatterns": ["*.cabal", "stack.yaml", "cabal.project", "package.yaml", "hie.yaml"],
      "filetypes": ["haskell", "lhaskell"]
    }
  }
}
Next, we have to use GHCup to make sure the "global" version of GHC matches our project's version. So, as an example, we can examine the stack.yaml file and find the resolver:
resolver:
  url: https://raw.githubusercontent.com/commercialhaskell/stackage-snapshots/master/lts/19/13.yaml
The 19.13 resolver corresponds to GHC 9.0.2, so let's go ahead and set that using GHCup:
>> ghcup set ghc 9.0.2And now we just open our project file and we can start seeing Haskell tips! Here's an example showing a compilation error:

The ability to get autocomplete suggestions from library functions works as well:

And we can also get a lint suggestion (I wish it weren't so "yellow"):

Note that in order for this to work, you must open your file from the project root where the .cabal file is. Otherwise HLS will not work correctly!
# This works!
>> cd MyProject
>> vim src/MyCode.hs

# This does not work!
>> cd MyProject/src
>> vim MyCode.hs
Conclusion
That's all for our Haskell Vim setup! Even though this isn't a full tutorial, hopefully this gives you enough ideas that you can experiment with Haskell in Vim for yourself! Next time, we'll look at getting Haskell working in Visual Studio!
If you want to keep up to date with all the latest on Monday Morning Haskell, make sure to subscribe to our mailing list! This will also give you access to our subscriber resources, including beginner friendly resources like our Beginners Checklist!